Zynsonix Link

Showing posts with label retro. Show all posts

March 30, 2021

NEOGEO Arcade Stick Pro Seimitsu Joystick and Button Replacement Mod

If you're like me and previously purchased the SNK NEOGEO Mini back in 2018, you might have seen the Arcade Stick Pro and figured it is just another similar device. To some extent, you'd be right... this is an emulation system that houses a handful of popular SNK games that you can play on a modern HDMI TV. On the other hand, I'd argue that the ASP is a much better product for the typical fan who wants to play the device rather than collect it, so long as you have space to store the larger form factor. 


One, you'll notice right off the bat that the HDMI output is far better looking than the NEOGEO Mini with crisper edges vs. the slightly blurry NEOGEO Mini. The second is rather than having a novelty mini arcade unit, you get a very solid joystick instead with nice clicky movement, responsive buttons and some weight to it.

Opening the unit up, you can see that SNK did not take shortcuts when they designed the unit. There's a metal plate on the bottom to provide that much appreciated extra weight, a clean layout and plenty of reinforcing pillars that make the stick very solid and sturdy. As a bonus, SNK set up the interior so you could easily switch out the buttons and joystick for aftermarket options should you wish. 

Personally I'm not the type that can tell much difference between a Sanwa stick vs. a Seimitsu stick or any other arcade brand out there. I don't play competitively so any enhancement to my guiding a character around the screen would be minimal at best. That being said, I love to mod things and this seemed like a fun little project to kill a couple hours and would hopefully make an informative post. 

The first (and actually most time consuming) part of the mod is to remove all the little plastic bits and screws from the bottom of the unit. I'd advise you put them all in a zip-lock bag so you don't lose any.


Once you have all ten screws removed, you can separate the top from the bottom. Below you will see the stock unit with the included joystick with square gate. Highlighted in red are screw holes that SNK included purposefully so you can install an aftermarket joystick. 


Removing the buttons is very simple and straightforward. You put a little bit of pressure on the center of the metal tab connecting the wire to the button. This dislodges a small metal protrusion that holds the tab in place via the little gap on the button contact. You can then remove the metal tab and wire from the button. Do not force these off or it will damage the metal tabs and you will have to bend them back in place or replace them. With the wires out of the way, you can use a channel lock wrench to press against the two sides of each button at the same time to clear it through the opening.

Replacing the buttons is even simpler, just pop them in place and replace the connections to the corresponding buttons. If you forgot what color goes where, simply use the image above as a reference. I personally used the Seimitsu PS-14-K buttons from the bounceback series just because I liked the concept that the buttons bounce back quickly if you were playing something like King of the Monsters and needed to win a grapple or something. You'll notice in the image below all the buttons are lined up identically in orientation, this is just for neatness and not required. 


The joystick requires a little more effort, mostly because you probably won't be able to find a current replacement joystick with the quick-disconnect tabs. For the joystick to mount within the Arcade Pro Stick, you'll need the MS style mounting plate. This will run $3-4 depending on where you get it. The joystick I chose is the Seimitsu LS-58-01-CR-SS, which is the LS-58 (a popular mid-ground stick) with red hardware and a 5 pin wiring harness socket. If you are having trouble finding the stick you want, you can replace the spring to a different weight without much issue. Also with the Seimitsu units, you can change the gate on the back. I chose a circular gate (called an Octoplate) rather than the square one it came with. Better for dragon punches I assume...? 

Before you remove the joystick, set your multimeter to continuity and set the probes on each of the four pairs of metal tabs where the quick disconnects are. Move the joystick to see what orientation shorts each and makes a beep, write these down so that way you'll know what to solder where. 

To remove the stock joystick, you'll simply need to remove the 5 screws circled below:


The new joystick is going to be agnostic to its orientation so long as you solder the wiring the same way you noted above. Rather than the pair of disconnects, you have two big solder joints on each corner of the PCB. You can test these with your multimeter with the wiring harness in to see which color is which direction. The return is common (all the pairs share the return connection). 


Each wire can be soldered now, you can use the color guide in this picture if your 5 pin harness is facing the buttons. One drawback is that the bottom of the joystick has a plastic tube that interferes with this placement, so you'll need to trim it off with a cutting wheel or your tool of choice. Each wire should be covered with some adhesive heatshrink tubing and then the bundle zip-tied together. 

Note there are four black adhesive circles in the corners of the image below. They like to fall off while you are working, so make sure to put them back before reassembly. 


Once complete, you can screw the unit back together and replace the little plastic screw-hiders. Final photos coming soon. 


June 29, 2020

The Retro Evercade Console is Here!

I've been waiting for the Evercade for quite a while and it's FINALLY here! 

It's pretty darn close to what I expected. The Evercade is a value-oriented product, so there are a number of compromises necessary to hit that low-cost sweet-spot. What really matters though is if it scratches that nostalgic itch and does a decent job of presenting the games, especially to those who may have never played them before. Get a low-down below of where Evercade really hits the mark and where it falls a little short:


Evercade Console
The Evercade console in white


What's great:

  • Huge selection of cartridges right out the door (10 available, 4 coming in Q3)
  • The console has a decent weight to it and the build quality is solid. There’s no quality concerns like with generic consoles from China like the SupaBoy (e.g. hair or dirt behind screen, smudges in finish, etc.)
  • The buttons have a great feel and response. The response similar to an Xbox controller, which is high praise.
  • The L+R buttons have a little less weight but make a satisfying clicky sound
  • The cartridges are a good size, maybe around the size of a Game Gear game (not tiny and easy to lose like the Switch)
  • Easy-to-access menu during gameplay
  • Nice looking, quality boxes for the cartridges and color manuals
  • Rechargeable battery
  • HDMI output
  • Low priced games and system. The system is about $100 with three cartridges, and the cartridges are $20 each. The system with all ten games is $200.

cartridge case

evercade cartridge case
Love the cartridge cases!

What could be better:

  • Cartridge fit is fairly tight… not on the contacts, but the left and right sides are lacking adequate clearance.
  • D-pad feels a little mushy, about what you’d expect from a 3rd party value controller
  • Screen angle viewing isn’t great, but you’re going to be head on playing this thing so not a big deal
  • Screen could be a little larger
  • There seems to be only one save state per cartridge, vs. one per game
  • Sound quality isn’t the greatest. Granted these are 8 and 16 bit tunes, but they can still sound better with a little more wattage and a larger driver.
  • A number of the games are two-player, but I don’t think there’s a way to link up two of these puppies.
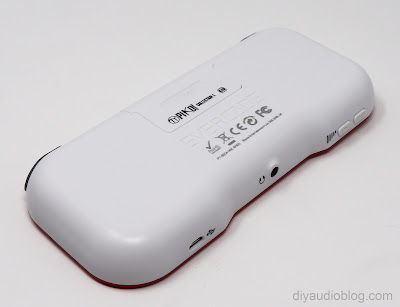
 

Evercade Console Back
That cartridge fit is tight!


Overall I think the Evercade is a really nice gesture to the retro gaming community. It’s a solid product with a price-point that’s accessible to many and already has great support from developers. The whole premise reminds me a bit of the NEO GEO X Gold, which was a nostalgic system released mostly for collectors where games were sold separately via cartridge. While I love SNK and the Neo Geo, I think the Evercade has more going for it than the X Gold with access to a variety of publishers. 

The real litmus test is in the games, and Evercade already has 10 titles available at launch (very impressive) and 4 more which will be releasing in Q3. Not only are there classic games, but new titles like Xeno Crisis and Tanglewood are being released. I’d really like to see it succeed so we can have even more newly released games and more classic collections to check out. I think the unit’s success in the market will be dependent on gaining more buy-in from devs so there are more carts available to consumers.


Storage Case
The storage case is a nice option


What could Evercade do to make a very solid release even better?

  • Allow a save state for each game and enable two player via a firmware update.
  • Offer a premium stand-alone console later down the line that addresses the compromises (screen, d-pad, speakers, maybe include a bigger battery) and sell for $199-$249. Collectors aren’t as price sensitive as normal consumers.


Currently available cartridges

  • Atari Collection 1 (with 20 games)
  • Namco Museum 1 (with 11 games)
  • Data East Collection 1 (with 10 games)
  • Interplay Collection 1 (with 6 games) 
  • Atari Collection 2 (with 20 games)
  • Namco Museum 2 (with 11 games)
  • Interplay Collection 2 (with 6 games)
  • Mega Cat Studios Collection 1 (with 10 games)
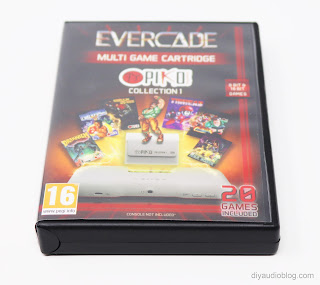
  • Piko Interactive Collection 1 (with 20 games)
  • Technos Collection 1 (with 8 games)