

Today's post is a guest post from my bud Ryan Price and covers the MOD Rock Bottom Pedal. Ryan's been getting his feet wet in the DIY audio scene and doesn't shy away from some classic point-to-point wiring.
Please excuse the possible lack of common decorum for a post. This is my first one and it’s a learning process. I picked up a DIY guitar pedal build kit by MOD from Amplified parts. I chose the Rock Bottom pedal for a few reasons. First is I wanted an analog Fuzz. Second is the extended low end so I can use it with both bass and guitar. the “3” rating seemed like a challenge for a pedal build novice with some soldering experience. Considering that I have plenty of time to kill as I’m currently recovering from a recent heart transplant, I went for it even if it was gonna be just outside my skill set so far. I was able to finish it over the course of about 4-6 hours over a few nights.
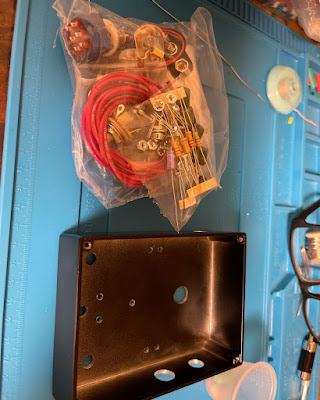 |
| The Pedal Kit |
Now for the breakdown. The MOD kit comes with everything you need minus tools and solder. I used a Hakko 888D soldering iron but for this application most would suffice I believe. Hand tools I used were a MusicNomad guitar multitool, strippers, dikes, hemostats, and some modified pliers. I put a bit of shrink tube around the jaws so as not to damage wire and components. While the kit comes with everything you need the wire is not easy to work with if you don’t have a solder pot. I own one but did not have access to it at the time of the build. I substituted the wire with some I had left over from a previous project. Its if a smaller gauge but of much higher quality. That’s the only substitution I made.
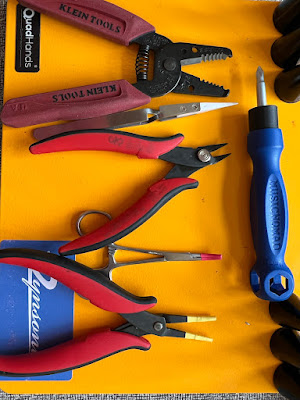 |
| Tools of the Trade |
The build is rather straightforward. Starting with terminal strips, switches, and connectors. The layout is very straight forward and with some planning can be a super clean build.
 |
| Classic Turret Strips |
Next they have you measure out the wire. As I followed the directions closely up to this point I found the lengths a bit on the long side (editors note: you can make the wires shorter depending on your OCD level). But I can see why as its easy to trim to size. Not so easy to add length! Now I got ahead of myself and terminated both ends of the runs as I was building. For my next build I plan to take things a bit slower. Before terminating any connection I will dry fit all components, bend and run, then get a plan of how to go forward. The directions are decent there are a few times you run into overlapping components.
 |
| Wired Up |
Component layout is definitely the most difficult part of the build and you should take your time. Plan ahead and follow the directions. That will make this build a breeze. Don’t get ahead of yourself and begin terminating at a whim like I did as you will regret it. It will also take more time than doing a layout before assembly. Trust me on that one!
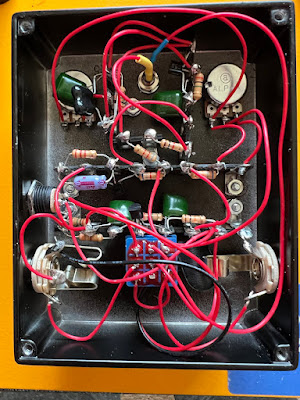 |
| All Parts Installed |
Once I fixed all my errors (there were many) it came together nicely. Powered right up and gave me sweet, sweet two transistor Fuzz! This pedal is a massive bang for your buck win. I can recommend it 100% to all but the most novice of DIY people. I can’t wait to build another MOD pedal in the near future. Amplified Parts has a great selection of all related components and tools (Editors note: if you're a knob snob they have a nice selection). As well as super solid shipping. I can’t recommend them enough.
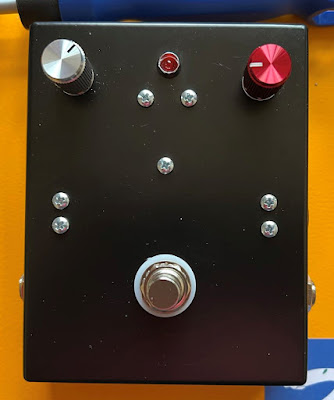 |
| Finished Up |
So if you’re got some soldering skills, desire to DIY, and a few hours I say go for it!
I left the sticker off. My wife is an artist and I’m going to have her paint and label the pedal!
(Editors note: we'll update the story when Ryan and his wife are all done.)


No comments:
Post a Comment