Zynsonix Link

Showing posts with label Cardas. Show all posts

May 2, 2018

WHAMMY Pass Labs DIY Headphone Amp

Wayne Colburn of PASS Labs was kind enough to release a new DIY headphone amp circuit into the wild, the WHAMMY, standing for Wayne' Headphone Amplifier Must Make Yourself. It's a nice simple build, no need to match parts or make adjustments, so it's perfect for the budding DIY builder. It's also inexpensive. The PCB, parts and chassis should be under $200 without much effort. Jim Tiemann aka 6L6 of DIYAudio has been kind enough to coordinate the project and has been instrumental in making it accessible. Having a headphone amp of this caliber available at this price is an incredible opportunity and I hope many can take advantage of it. If you're not familiar, Pass Labs is very

You can read more about the project here and boards can be purchased for a very reasonable price at DIYAudio. And you can learn more about the circuit design by watching this Youtube video:

Wayne Colburn of Pass Labs, the designer of the WHAMMY


I'll be briefly walking through my own build. I encourage you to also check out Jim Tiemann's build as it is more granular. My parts choices are also going to be outside of the standard BOM to some extent and will be more expensive, but DIY is fun because you have the freedom to make some unique choices without deviating from the original circuit.

As I knew I would have a little bit of extra headroom in the chassis I'd be using, so I added a piece of Dynamat between the board and the transformer just for a little bit of extra vibration damping. There's electrical tape over some of the larger contacts to prevent any shorting with the aluminum on top of the Dynamat.

Dynamat mounted on the PCB


After this, the power supply components were populated on the board. Normally, you would populate the small components all across the board such as the diodes, resistors, etc., however in this case populating the power components first allows you to test the power supply and ensure it is running properly and within tolerance before moving on. Review Jim's write-up for additional information on the measurements.

Please note the snubber capacitor (C20) should be an X-type, so you might see X1 or X2 in the model number. Before buying the capacitor, check the datasheet to ensure it is X1 or X2 rated. The lead spacing is 22.5mm. I personally used part 594-2222-336-10224 from Mouser. The PSU caps are Nichicon "For Audio"... for whatever that's good for ;)

Power supply populated and ready for testing


After the power supply is tested, fully disconnected, and the caps allowed to fully discharge, I moved along to populate the smallest parts first. If you've read my blog in the past, you'd know I really like Kiwame/Koa Speers resistors. These can be found at Mouser under SPR2 and are 40 to 50 cents each, rated at 2 watts which is far above what's actually needed. Not all values are there, so you can get the remainder at a boutique provider like PartsConnexion or just get some Vishay Dales at Mouser. 

Adding the resistors


Then the rest of the parts are added. While Wayne mentioned that the Silmic IIs, which are now being produced in China, aren't as reliable as they used to be, I still like the sound of them so I went ahead and used them. They're over-rated too @ 50V, so hopefully they'll last a while. You'll notice they're a bit large, so some creative mounting is needed. Wayne suggested using Nichicon BPs (bi-polar caps, they're iridescent green) if you'd rather not use Silmics. C1 and C5 are the input coupling caps and should be of high quality as they're directly in the signal path. I personally used some vintage Sprague paper-in-oils, but you can likely fit some of the smaller narrow Mundorf EVO caps or Clarity Caps, either of which can be found at PartsConnexion. The lead spacing is roughly an inch. 


All PCB parts populated


I hate this picture as it looks terrible from all the flux (this is before I cleaned it with some isopropyl alcohol and a toothbrush), but It shows where the film bypass caps are. The units in the audio section are polypropylene and the units in the power supply are polyester. The twisted pair is pulling off the 22V secondary for a pilot light.  

WIMA film bypass caps on bottom of PCB


The chassis I selected is from IAG DIY Tube Audio Products. He lists his chassis on ebay and on his website. Hand-made in the USA and built like a tank. It would be a slightly tight fit so I needed to see where items would be mounted to the front and back of the chassis so they wouldn't bump into any parts on the inside. The IEC filter in particular needed to be offset from the center so it didn't bump into the PCB mounted transformer. I decided to mount the 0.5A fuse and socket on a blank part of the PCB so there'd be one less hole drilled in the chassis. 


Lining up the chassis-mounted parts


Once everything was lined up and the holes cut, the PCB was secured in the enclosure using 1/2" standoffs. The front panel has a four pin connector in addition to a locking Neutrik TRS as most of my headphones are wired that way, so it saves me from having to use an adapter.

Wiring is scraps of Cardas I had in my wire bin, 4x24, 2x24 and 2x21 and some 24AWG, all litz in teflon. The potentiometer is the $40 100K Audionote with solder tags. It's nice and small so I didn't have to worry about it bumping into a discrete opamp. The IEC filter is from Furutech, gold plated. I normally wouldn't spend the money on it but it was discontinued and quite a bargain. RCAs are Cardas rhodium plated. The switch is a simple 3A rated toggle I picked up from Radioshack when they were clearancing everything. The LED pilot light is one from a guitar shop typically used for an effects pedal. Everything else is from the BOM. 


Wiring everything up


Here's a few more images of the chassis with the wood panels.

Front of the WHAMMY amp in the chassis

Back of the WHAMMY amp in the chassis


I used a very simple circuit from ClassicValve for the LED. 

Pilot light circuit to protect LED


Here's an image with the bottom panel and feet installed. 

Bottom panel with vents


...and here's the WHAMMY almost done, just missing the knob. 

Nearly complete

It's quick and easy to swap the op-amp on the unit to slightly alter the sound. Dropping in a Burson Supreme Sound V5 soundeda bit less constricted than the Texas Instruments op-amp that's in the BOM. The difference was less pronounced than if you use a Burson in a DAC, but still an improvement and worth the price of admission (you only need one). I found the V5i picked up a little more noise in this particular amp, so stick with the V5 if you get one. I also swapped in and out the optional capacitors just in case they improved the sound with the Bursons, but wasn't able to hear any difference in any of the configurations. 


Final pics coming soon. 


Please remember that building/modifying circuits can be dangerous to you and/or your surroundings and should only be performed by a certified technician. The owner of this blog and all associated parties can not / will not be held responsible if you attempt a build or modification posted above and cause physical harm to yourself or your surroundings. Many electronics contain high voltages that can kill, and mods, if performed improperly, can be a fire hazard. 


September 28, 2014

Custom Audio Cables Make for Great Eye Candy

I've been spending a bit more time experimenting with paracord sleeving, it performs quite similarly to nylon multifilament and comes in all sorts of different shades. Below are some cables assembled with a fun splash of color, along with some choice audiophile componentry like Cardas ultra pure silver and Neotech ultra pure ohno cast copper. Perfect for your headphone or speaker amp. They are available for sale on ebay, first come first serve ;)

Pure silver (Cardas Silver) mini to RCA, Switchcraft right angle mini, Vampire RCAs - 1 1/2 feet


Ultra pure ohno cast copper in Teflon, right angle Switchcraft mini, Vampire RCAs - 2 feet


UPOCC Copper headphone extension cable with Neutrik 1/4" male, Switchcraft 1/4" female - 6 feet


Pure Silver (Cardas Silver) mini to mini cable with Neutrik gold mini connectors - 5 inches tip to tip


UPOCC Copper Mini to RCA Cable with Switchcraft straight mini and Vampire RCAs - 2 feet


If you like what you see above but need something custom, Zynsonix Audio is welcoming requests for any audio cable solution you need. Until next time!

March 28, 2014

Recabling the Beyerdynamic Tesla DT-1350 Portable Headphones

Beyerdynamic has a number of different headphones featuring Tesla drivers now. Some are very impressive, like the Beyer T-1 and T-5p (see my recable of the T-5p here) and some aren't really my cup of tea, such as the Beyer T-70 with what I perceived to be a bright and peaky sound signature. So if you are considering purchasing one of the Beyerdynamics with Tesla drivers, to audition it before purchase if you can. In this post I will be recabling the Beyerdynamic DT-1350 portable headphones with Tesla drivers.

Like all Beyerdynamic headphones I've ever used, the DT-1350 is robustly built and designed to withstand many hours of use. The headphone splits in the center, much like the Sennheiser HD25-1 II headphones, for additional adjustment and comfort. The drivers have an 80 ohm impedance, so a headphone amp can be beneficial to bring out the best in these. Overall, I would say that the sound very clear, coherent, and is more concentrated on the higher end of the spectrum, more treble-oriented with a bit less bass quantity than I'd desire. I could see the similarity in signature to the DT880 250ohm headphones, which many audio enthusiasts enjoy for their even-handed presentation.

So in order to add a little warmth and bass to the equation, I decided to recable the DT1350s with Cardas internally litzed wiring. The Cardas 2x23.5 is a great size for portable headphones when you don't need balanced operation. It's relatively flexible and thin for an aftermarket cable. I also chose to use an Oyaide rhodium plated plug (see here for a 3.5mm plug rundown) as it works great with portable devices such as a phone with a case on it due to the slim barrel.

Oyaide Rhodium Plug and Cardas wiring

The end of the wire is stripped revealing two 23.5 gauge conductors and a shield which will be used for the ground (also called return). You'll note the Oyaide connector has teensie-tiny soldering areas, so care is required to ensure there is no shorting of the left and right channels or melting of the dielectric.

Stripped Cardas Wiring

As you can see, the Cardas wire fits perfectly in the thin barrel of the Oyaide connector, no drilling or dremmeling was required. 


With the cable ready for installation, the Beyerdynamic cups would be opened. The pads are held on with a sticky tack that goes around the outer circumference. In my experience, they can be pulled off with a bit of force and reinstalled without losing the tackiness, although I'm sure if removed multiple times, they would need to be replaced, or some sort of double sided tape might need to be installed.

Examining the interior, the Tesla driver is hiding under this white plastic shell, so not quite as fancy as the interior of the T5p. The wiring attaches to a small solder board, which allows the ground to be split, and would potentially protect the driver solder pads if there was some major yanking on the wire.

Beyerdynamic DT1350 with driver exposed

Installing the Cardas wire requires the existing wire entry area to be Dremelled slightly to accomodate the larger cable. Holding it in place is a pair of miniature zip ties and epoxy to ensure that when the wire is pulled, it will not damage the solder joints inside the cup. Heatshrink is used to provide some additional strain relief. The wire is soldered to the solder pad that distributes the different channel signals and ground to each of the earcups. 

Note the soldering pad near the top of the cup


After the soldering work is complete, the driver is returned to its original position.


The tacky pad is replaced on the headphone cup and the recable is now complete. 

A complete DT1350 with Cardas cable

If you'd like to purchase a new pair of pads for the DT1350, Beyer offers original replacements (of course) and they have some suede-type pads which some people find more comfortable for longer listening sessions. That part number is 908363 and can be purchased from Beyerdynamic USA. 

Suede Pads from Beyerdynamic

The DT1350s come with a very nice traveler case, and the recabled version fits inside just fine. 


So after performing the recable, the DT1350 has what I would perceive to be a warmer and deeper sound signature. It doesn't rival the Amperiors or HD-25 aluminums for bass quantity, but it has a nice, palpable midrange and upper treble presentation that other headphones can't match. 


The Fine Print: The above steps detailing the recabling of a headphone are for entertainment purposes only, and not to be performed under any circumstances. The owner of this blog and all associated parties can not / will not be held responsible if you attempt the process posted and cause physical harm to yourself, your surroundings or your property. Please keep this in mind.


March 4, 2013

Beyerdynamic T5P Recable

Beyerdynamic is a family-owned audio equipment manufacturer based in Germany that produces headphones, microphones and wireless audio systems. The headphones produced by Beyer feature great build quality and the sound produced by their top-tier headphones is something the discerning audiophile can really appreciate. The DT770, DT880 and DT990 models are ideal choices for the listener on a budget, and if one likes what they hear, there are the pricier Tesla-based models that Beyer introduced over the last four or so years: the T1, T5p, T50p, T90 and T70.

Beyer's Tesla lineup

The Tesla nomenclature comes from the redesigned transducers that achieve efficiency values of over one Tesla, which is the unit of measurement for magnetic flux density. This provides the listener with nearly double the volume at the same input level as typical headphones. Also unique to the Tesla line are the drivers which are angled toward the listeners ear.

Today I'll be recabling the luxurious Beyer T5p. The T5p is effectively the mobile version of the T1 (The "p" standing for portable) and with it comes a few changes, including a short 4 foot cord and a 32 ohm impedance which can be driven easily from sources like the iPhone / iPod and other portable music players, and leather pads to help attenuate outside noise.

Beyerdynamic T5p

Something I've found with some Beyer headphones (especially the DT880 / 250ohm) is the upper-midrange can cause me ear fatigue over long listening sessions. This certainly doesn't affect everyone, but a few other people with sensitive ears have mentioned the same finding to me. I've found the best remedy for this is to recable the headphone with Cardas enameled copper wire, which effectively warms up the sound signature and subtly rolls off those frequencies which I personally find fatiguing.

Cardas copper wire

The first step is to braid the Cardas copper wire in a litz-braid. I've chosen three different colors in this case, red for right signal, blue for left signal and black for ground.

Braided Cardas wire

The cable is then sleeved with the soft black nylon multifilament sleeving. You'll notice below that electrical tape is over the ends of the wire, this prevents the small conductors from snagging the sleeving while they are fed through by hand. 

Sleeved with black nylon

Once the leather earpad and sealed ring are removed, that gives access to the driver housing. Note the angled driver in the photo below. 

The T5p angled driver

Take a look below at the beautifully machined Tesla driver housing, I've never seen anything like it. 

T5p Telsa driver backside

The existing wire and solder is removed. This is done using as low a temperature as possible as to not damage the delicate drivers. Next the Cardas wire is prepped. The Cardas wire is enameled, so it has to be either dipped in a solder pot or heated up with solder on the tip on an iron to tin it and remove the enamel. Once appropriately tinned, it is soldered in place. 


Cardas wire soldered in place

Once the wire is soldered in place, a stain relief system and adhesive is used to keep the wires in place (and helps prevent the tugged cable from yanking on the solder tabs). The headphone is then put back together with extra attention paid to the sealed ring (the seal is very important to the sound). Below is the completed product. 

Recabled T5p

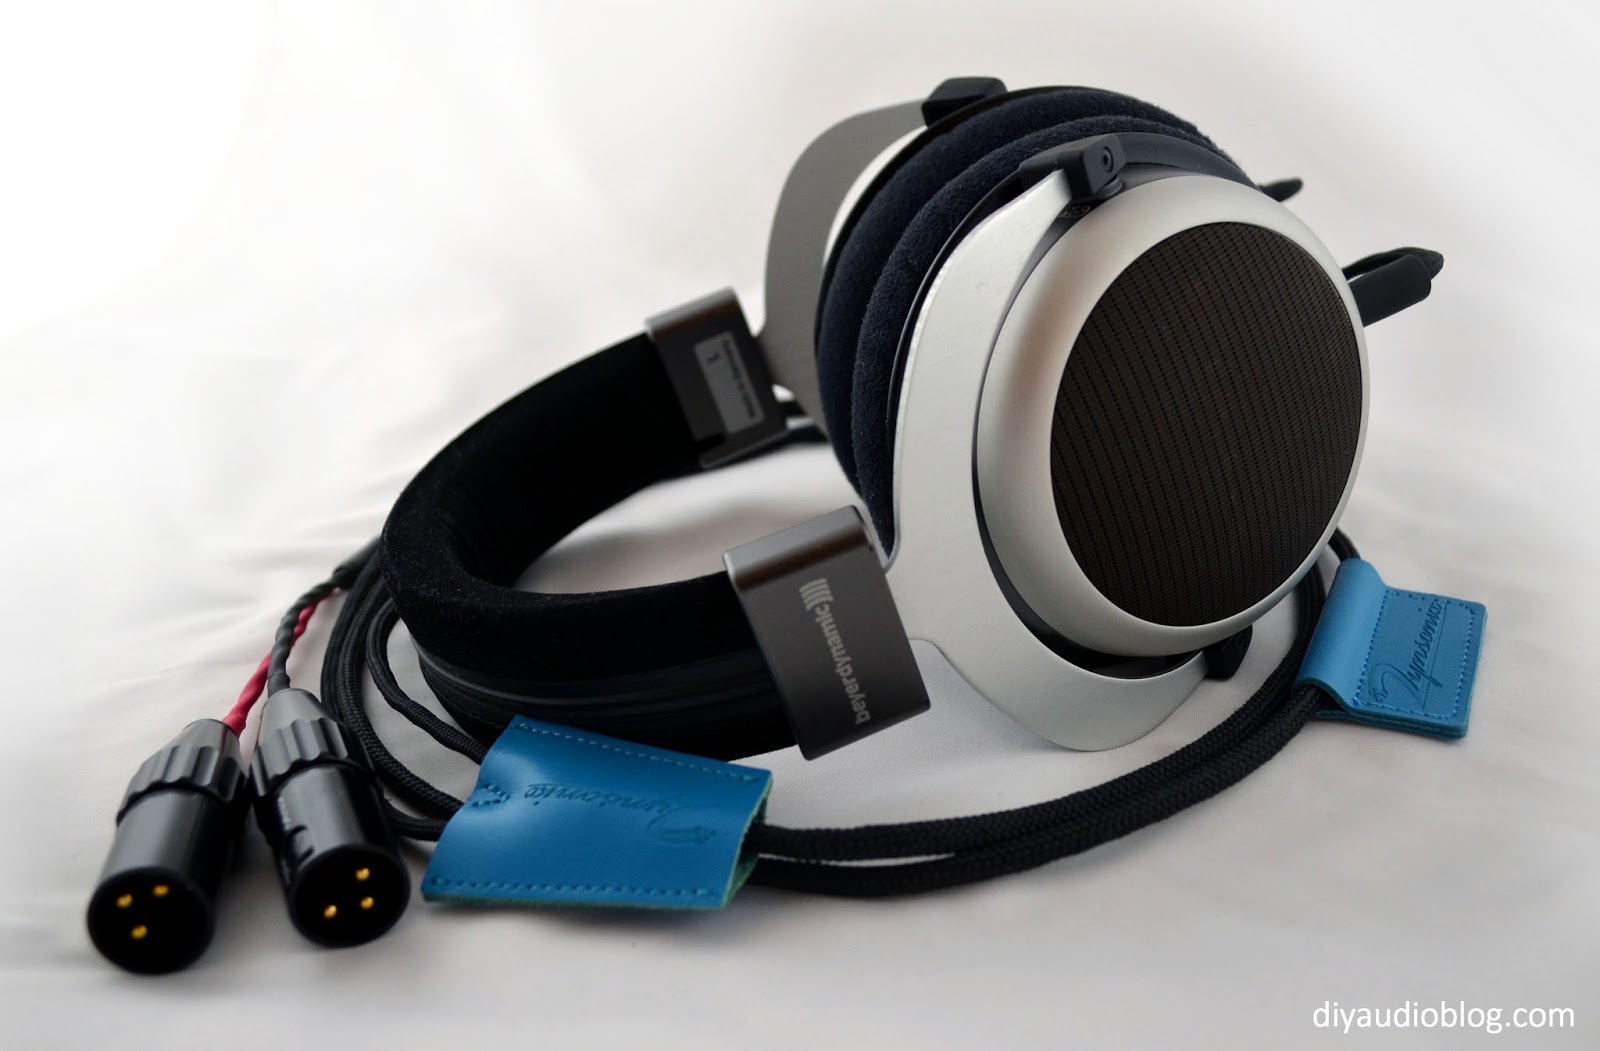
The T5p has a incredibly clear, detailed and coherent sound signature. Color me impressed. I hope you enjoyed this post, if you'd like to have your headphones recabled, please contact Zynsonix for a quote. Since Beyerdynamic T1, T5p, T70 and T90 are all quite similar, the same mods /recables can be performed on all of them. Here is a Beyer T90 that has been recabled for balanced listening with dual XLRs.

Beyerdynamic T 90 balanced with dual XLRs


The Fine Print:
The above steps detailing the recabling of a headphone are for entertainment purposes only, and not to be performed under any circumstances. The owner of this blog and all associated parties can not / will not be held responsible if you attempt the process posted and cause physical harm to yourself, your surroundings or your property. Please keep this in mind.


January 20, 2013

Furez Copper Subwoofer Cable

A subwoofer only reproduces a limited range of audio in your system, most likely a frequency range within 20Hz and 100Hz. With this being said, subwoofer cables aren't as critical as the interconnects responsible for a much wider range (in my humble opinion). So, if you're weighing the benefits of subwoofer cable versus a pair of interconnects between your CD player and amp, I'd say go with the interconnects first. Still, as audio enthusiasts, we can't simply ignore our poor subwoofers, can we?

Today I will be assembling a pair of subwoofer cables from Furez FZ162AA audio cable. This is a reasonably priced cable that features thick 16 gauge oxygen-free copper conductors (99.997% pure, aka 4Ns), a very adequate foamed polyethylene dielectric and a dual-shield (tinned copper braid and a aluminum foil wrap) to help protect against EMI/RFI interference. I'll also be using some Furez FZ100BS black and grey sleeving to dress up the cable a bit, and a set of Cardas GRMO Rhodium over silver-plate RCAs.

The cable itself is nice and thick, thicker than the Cardas Crosslink 1i interconnect cable.

Furez FZ162AA Audio Cable

Taking a look a little closer, you'll notice the thick 16 gauge copper conductors. Normally audiophile interconnects are between 20 and 24 gauge, so this is a bit thicker than typical and thus will have additional capacitance (Capacitance @ 1KHz: 20.86 pF/ft). One could even use it for a speaker cable at this thickness. Whether or not this will be beneficial when used as a subwoofer cable remains to be seen.

Furez cable detail

As mentioned above, I'll be using some Furez FZ100BS black and grey sleeving to dress up the cable. This sleeving is made specifically for Furez products by ViaBlue. To see some of ViaBlue's bling, check out this mini to RCA cable made using their products. The FZ100BS is made from Monofilament Polyethylene Terepthalate (PET) and Fiber Fillers.

Furex FZ100BS black and grey sleeving

Do note that a hot knife is needed to cut the sleeving, otherwise it will fray, as you will see in the image above. The hot knife melts the sleeving together and prevents this. Also note that as you sleeve the cable, you will lose some length as the sleeving is expanding slightly. This amounted to several extra inches for each five foot cable length.

Noting the cable stripped below, you will see the two 16 gauge conductors, one in red dielectric, one in black. You will also see the mesh copper shield. For this particular cable, the mesh shield will be soldered to the ground on the source side and not connected on the other (floating shield configuration).

Stripped wire

Here is the opposite end of the cable after tinning the conductors. Tinning simply means covering the conductors with solder in this case. On this end of the cable, the shielding is not connected, so it is trimmed down and isolated with 3M electrical tape. Note that the black conductor (ground / return) is cut slightly shorter intentionally.

Tinned conductors

Now we will be soldering the Cardas RCA connector to the conductors. This is done by removing the barrel of the connector, then sliding it over top of the cable with the tinned ends and lining them up with the appropriate solder terminals. The red conductor (signal) goes to the center pin and the black conductor (ground / return) is soldered to the inner barrel. The Cardas GRMO requires quite a bit of heat to ensure a proper joint. I find that a solder station with adjustable temperature is necessary. The joints should be strong and shiny when complete. 

Cardas GRMO soldered in place

Once the soldering is complete, the RCA needs ample time to cool (they will be extremely hot to the touch). Then the outer barrel can be screwed in place and 1/2" adhesive heatshrink placed on top to act as a strain relief. 

Barrel and heatshrink added

I tend to like to cover about half of the Cardas barrel with the heatshrink so that some of that shiny gold bling is still visible on the completed cable.  

Heatshrink in place over barrel

All that's left is heating up the heatshrink with the heat gun and we have a completed cable. A second identical cable was made for the right channel and now we have a very fancy pair of subwoofer cables.

A complete set of subwoofer cables

Hope you enjoyed reading this post. If you are interested in having your own custom subwoofer cable (or any other cable) made, please contact Zynsonix for a quote.

The Fine Print:
The above steps detailing the building of a cable are for entertainment purposes only, and not to be performed under any circumstances. The owner of this blog and all associated parties can not / will not be held responsible if you attempt the process posted and cause physical harm to yourself, your surroundings or your property. Please keep this in mind.