Zynsonix Link

Showing posts with label DIY headphone. Show all posts

September 9, 2020

Pioneer SE-700 Vintage Headphone Cable Mod and Balancing

The Pioneer SE-700 were the company’s flagship headphones released back in 1974. The driver is an unusual piezo-electric type. I am personally not aware of any other headphone manufacturer that offered this type of driver, but feel free to share in the comments if you know of one. The SE-700, SE-500 and SE-300 all use a similar element. 

Pioneer SE--700 old advertisement

An old advert for the SE-700 touting their specs


I’d describe the sound as airy, crisp, and similar to an electrostat with a detail emphasis. Bass quantity is very low, which I believe is typical of this type of driver. The simple metal frame and gimbals look rather elegant, and the overall unit is pretty light. The way it rests on the head is slightly odd compared to modern headphones, but it’s still very usable.

The piezo-electric driver is a very thin piece of metal foil with a frame going around the perimeter, with the positive and negative connections at the bottom. It is covered with bright yellow foam resembling a dish sponge. It is also quite delicate, so even opening the headphone can damage the driver. The unit is sealed shut with rubber cement or a similar adhesive so it must be opened very slowly and carefully to access the inside. 


Pioneer SE--700 old manual

An image from the user's manual circa 1974


The wire connections for the driver are circled in red below:


Pioneer SE--700 inside earcup


If you’re looking to purchase one of these you can keep an eye out on Reverb, eBay or similar platforms. Price for a good example will generally be between $80 and $150. You’ll probably want to replace the wiring including the 3-meter cloth-covered cable, and the vinyl headband and ear pads which will likely be flaking.

My client Steve who sent me the headphones had already replaced the pads and requested the inner wiring be replaced. The existing wiring contacts had been twisted together and covered with heatshrink (see above image), which seemed like an odd manufacturing choice and not an ideal connection. Running single strands from the connection would sound better. You’ll note both sides of the headphone below after the cabling was replaced.


Pioneer SE--700 inside earcup cable mod

Pioneer SE--700 inside earcup cable mod

The headphone was reassembled using 3M double-sided tape so it can be more easily opened if needed. Steve will be crafting a calfskin headband for the unit as a replacement for the original vinyl headband, which I feel is the only visual let-down. It appears EricJ from HeadFi created an excellent tutorial back in 2007 on creating a replacement headband which you can find here. Below you'll see the refurbished/modded unit.  


I hope you enjoyed this post on one of the more interesting vintage headphones out there. If you have a headphone that needs a cable upgrade please be sure to visit Zynsonix.com. 


Disclosure: Please remember that using a soldering iron and/or modifying headphones can be dangerous to you and/or your surroundings and should only be performed by a certified technician. The owner of this blog and all associated parties can not / will not be held responsible if you attempt a modification posted above and cause physical harm to yourself or your surroundings. 

August 20, 2020

Avantone MP1 Mixphones Balanced Headphone Cable Mod

Not a headphone commonly discussed on HeadFi, but certainly deserving of some merit, is the Avantone MP1 Mixphones. They are touted as “suitable for use in live sound, DJ, studio recording, mixing playback and listening applications“. The earpads and cups are quite large, isolating, and comfortable, and house sizable 50mm drivers inside. A client of mine, Steve, with a penchant for unusual looking electronics sent me one to work some magic on to see how we could improve it.


The headphone comes with a 3.5mm input on one side and a little switch on the other side with a rudimentary circuit for adjusting the sound to your liking. Steve had tried the unit with an aftermarket Zynsonix cable first, but wanted to run it balanced, and the only way to do so was to remove this little device, which I assumed would help with the clarity anyway.

The circuit, switch and the 3.5mm inlet would all be removed in favor of mini XLR connectors on each cup. Brainwaves XL Hybrid earpads would also replace the stock pads, which Steve mentioned were comfortable but tended to flatten out over time. I indeed read the same thing from other reviewers online so it appears to be a common issue.

The sound had nice body and warmth, but wasn’t super clear, and the resolution on the lower end of the spectrum was somewhat lacking. I knew some mass-loading damping material would help with this and tighten up the bottom end a bit. On the inside, there are more metal parts than you typically find inside a headphone as metal, while adding mass which can be a good thing, tends to weigh things down. Fortunately the headphone remains comfortable. Avantone lists the weight at 550 grams, however it didn’t feel that heavy on my head. I recall Audeze’s EL-8 titanium as the only headphone I found was heavy enough to be uncomfortable, although some have said the same thing about the new HEDD Audio HEDDPhones as well. Good weight distribution goes a long way in assisting with this.

I placed some damping material on the driver surround and the inside of the cup strategically. You don’t need too much to get the desired result. Once everything was put back together with the new balanced cable, circuit delete, damping material, and pads, the sound was notably more resolving and controlled in the lower-end especially. Note the damping placement below:

Damping material placement


Steve’s impressions:

Now, to the unmodified and your modification versions of the Avantone Pro MP1 headphones. Both have Brainwavz XL Round Hybrid earpads. The unbalanced version has a Trebuchet cable. The balanced version has a Ballista cable. They are both driven, not at the same time, from the headphone outputs on the front panel of the Soekris dac1541. Source is a Nuprime CDT-10, output set to 192kHz sample rate, AES/EBU connected to the DAC. Good results began after 15 hours of operation; my observations here are at the 25-hour mark.

As much as I liked the unbalanced version, the balanced version has more of the good stuff: crispness, bass extension, expansiveness, body, blacker background. Surprisingly, this results in a less dry and less analytical presentation than the unbalanced version. This balanced version is easier to listen to for longer sessions. I did try line level balanced output from the Soekris into an XDuoo TA-20 amplifier. [FYI, for this amplifier, balanced in and out is noise free. Any unbalanced, in and/or out, is too noisy for me.] This was not as good a combination. The Avantone headphones, probably because of their very low impedance [16 ohms] and very high sensitivity [113 dB] need the stability and the low noise of solid-state amplification. All in all, a worthwhile and satisfying result.


You can see some images below of the unit. Steve took some of the latter. I took far more images during the process however my Canon T7i decided it was time for a summer vacation and didn’t save the images to the memory card.


Avantone MP1 Mixphones Balanced Headphone Cable Mod


Avantone MP1 Mixphones Balanced Headphone Cable Mod


Anyway, hope you enjoyed this write up, and if you’d like an aftermarket cable or complete recable of the Avantones or other headphones please contact Zynsonix Audio. Thanks very much to Steve for generously sharing his thoughts and time as well!


Disclosure: Please remember that using a soldering iron and/or modifying headphones can be dangerous to you and/or your surroundings and should only be performed by a certified technician. The owner of this blog and all associated parties can not / will not be held responsible if you attempt a modification posted above and cause physical harm to yourself or your surroundings.


March 4, 2013

Beyerdynamic T5P Recable

Beyerdynamic is a family-owned audio equipment manufacturer based in Germany that produces headphones, microphones and wireless audio systems. The headphones produced by Beyer feature great build quality and the sound produced by their top-tier headphones is something the discerning audiophile can really appreciate. The DT770, DT880 and DT990 models are ideal choices for the listener on a budget, and if one likes what they hear, there are the pricier Tesla-based models that Beyer introduced over the last four or so years: the T1, T5p, T50p, T90 and T70.

Beyer's Tesla lineup

The Tesla nomenclature comes from the redesigned transducers that achieve efficiency values of over one Tesla, which is the unit of measurement for magnetic flux density. This provides the listener with nearly double the volume at the same input level as typical headphones. Also unique to the Tesla line are the drivers which are angled toward the listeners ear.

Today I'll be recabling the luxurious Beyer T5p. The T5p is effectively the mobile version of the T1 (The "p" standing for portable) and with it comes a few changes, including a short 4 foot cord and a 32 ohm impedance which can be driven easily from sources like the iPhone / iPod and other portable music players, and leather pads to help attenuate outside noise.

Beyerdynamic T5p

Something I've found with some Beyer headphones (especially the DT880 / 250ohm) is the upper-midrange can cause me ear fatigue over long listening sessions. This certainly doesn't affect everyone, but a few other people with sensitive ears have mentioned the same finding to me. I've found the best remedy for this is to recable the headphone with Cardas enameled copper wire, which effectively warms up the sound signature and subtly rolls off those frequencies which I personally find fatiguing.

Cardas copper wire

The first step is to braid the Cardas copper wire in a litz-braid. I've chosen three different colors in this case, red for right signal, blue for left signal and black for ground.

Braided Cardas wire

The cable is then sleeved with the soft black nylon multifilament sleeving. You'll notice below that electrical tape is over the ends of the wire, this prevents the small conductors from snagging the sleeving while they are fed through by hand. 

Sleeved with black nylon

Once the leather earpad and sealed ring are removed, that gives access to the driver housing. Note the angled driver in the photo below. 

The T5p angled driver

Take a look below at the beautifully machined Tesla driver housing, I've never seen anything like it. 

T5p Telsa driver backside

The existing wire and solder is removed. This is done using as low a temperature as possible as to not damage the delicate drivers. Next the Cardas wire is prepped. The Cardas wire is enameled, so it has to be either dipped in a solder pot or heated up with solder on the tip on an iron to tin it and remove the enamel. Once appropriately tinned, it is soldered in place. 


Cardas wire soldered in place

Once the wire is soldered in place, a stain relief system and adhesive is used to keep the wires in place (and helps prevent the tugged cable from yanking on the solder tabs). The headphone is then put back together with extra attention paid to the sealed ring (the seal is very important to the sound). Below is the completed product. 

Recabled T5p

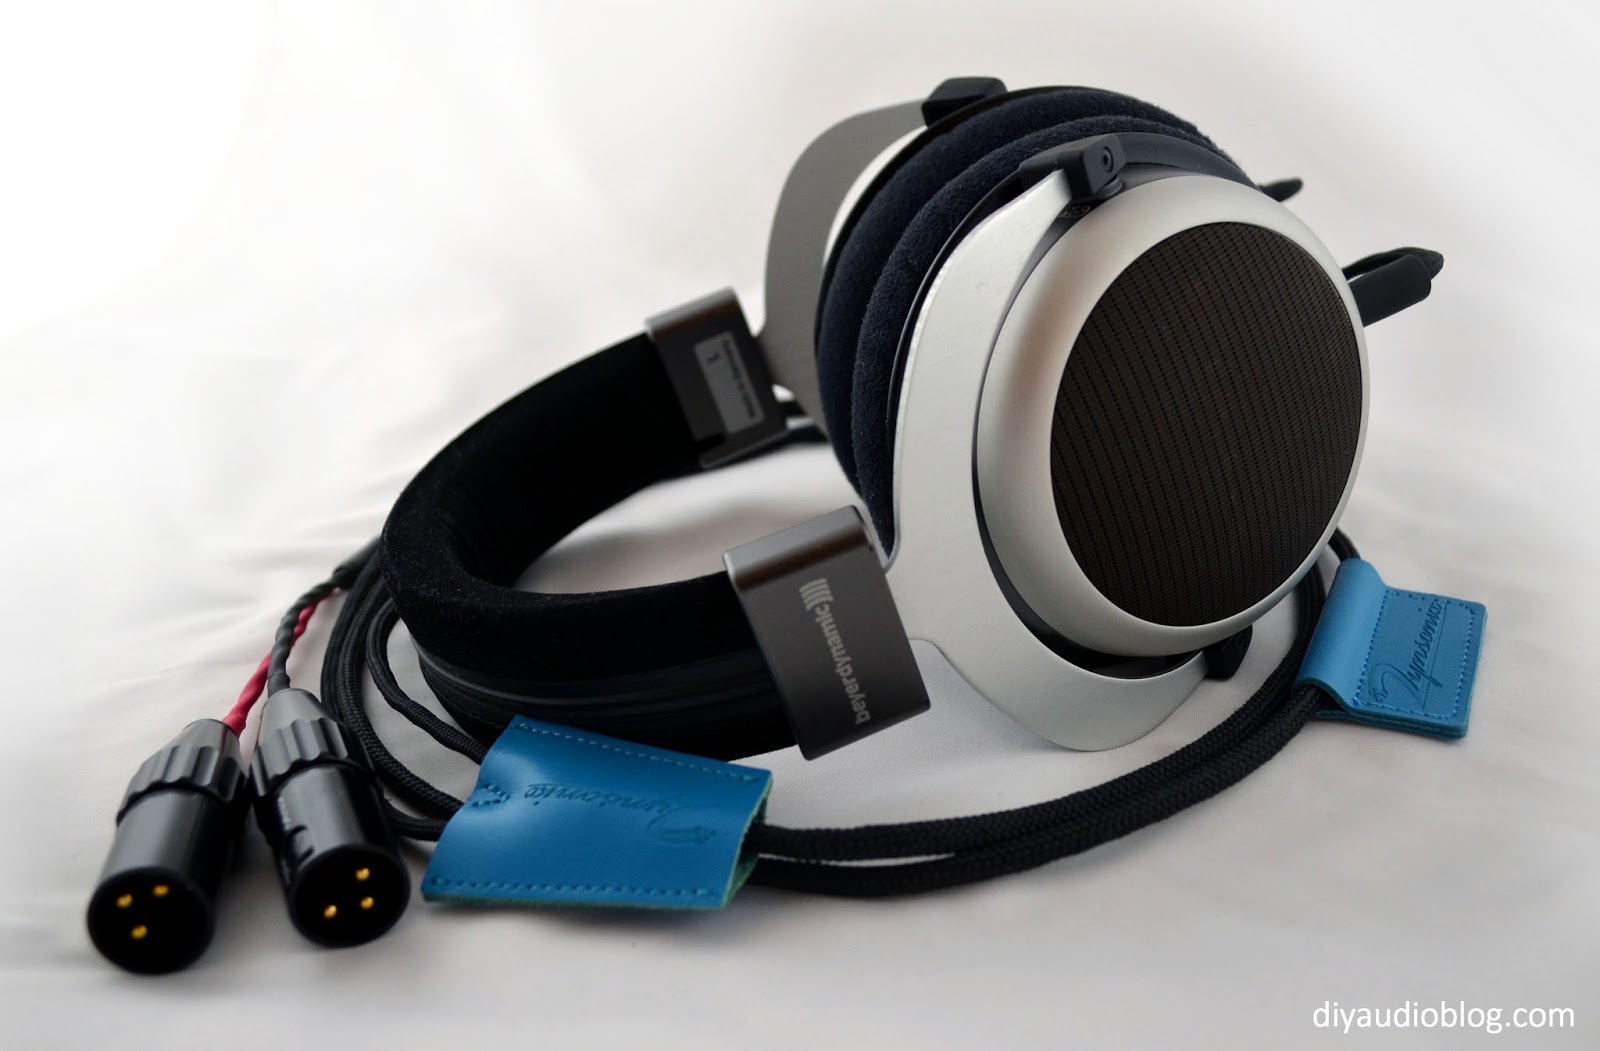
The T5p has a incredibly clear, detailed and coherent sound signature. Color me impressed. I hope you enjoyed this post, if you'd like to have your headphones recabled, please contact Zynsonix for a quote. Since Beyerdynamic T1, T5p, T70 and T90 are all quite similar, the same mods /recables can be performed on all of them. Here is a Beyer T90 that has been recabled for balanced listening with dual XLRs.

Beyerdynamic T 90 balanced with dual XLRs


The Fine Print:
The above steps detailing the recabling of a headphone are for entertainment purposes only, and not to be performed under any circumstances. The owner of this blog and all associated parties can not / will not be held responsible if you attempt the process posted and cause physical harm to yourself, your surroundings or your property. Please keep this in mind.