Zynsonix Link

Showing posts with label DIY Power Cord. Show all posts

August 8, 2011

Custom Right Angle Double Shielded IEC Power Cord

So you may notice from the abundance of power cords on DIYAudioBlog that I enjoy making them ;) I find that they're both cost effective and higher quality compared to many audiophile-marketed power cords. Also, if you're bitten by the DIY bug, you tend to enjoy building everything you can on your own. In this post, I'll be assembling a relatively short 3 foot right angle double-shielded IEC power cord. This will be my first double shielded power cord, making use of both a tinned copper mesh braid and a full coverage EMI / RFI blocking 3M aluminum tape shield.

What's unusual is many of the handmade audiophile power cables don't use a shield at all; it's typical to see a cable with three 10 gauge conductors in a spiral within a big thick PVC jacket, but no shielding when it could be easily incorporated. Because these power cords are huge and make use of big conductors, they have a ton of capacitance, which offers EMI / RFI a great opportunity to rear its ugly head. Companies like PS Audio offer shields on their cords; their pricier models offering as many as four shields. It's hard to say if adding shield after shield is beneficial having never tested past 2, perhaps it can be the subject of a future post.

This cord will making use of a right-angle hospital-grade Marinco 3 prong plug. This is achieved by purchasing the typical Marinco 8215 plug (~$9) and the Wattgate WG15RA (~$15) right-angle adapter piece and combining the two. The right-angle adapter can be oriented in eight different positions depending on what angle you'd like the wire leaving the outlet.

The Wattgate WG15RA
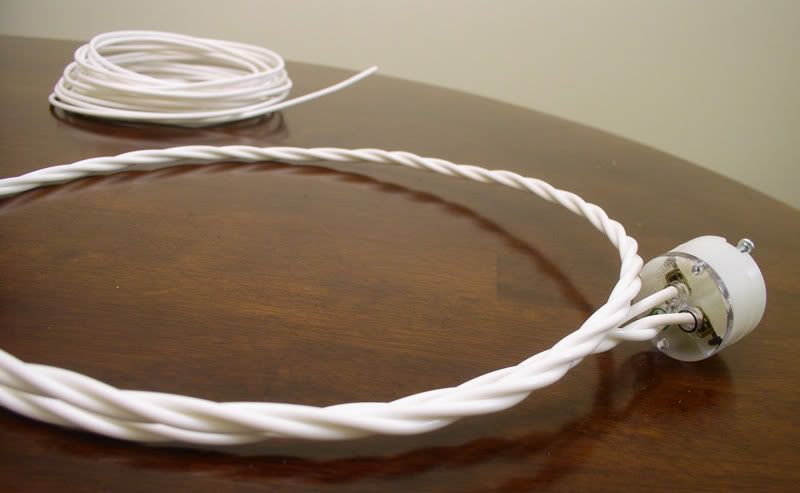
The cable starts like the other power cables I've built. I trimmed three 10 gauge SPC in Teflon conductors and twisted them together in a spiral by hand.


Spiral of three 10 gauge SPC in Teflon conductors


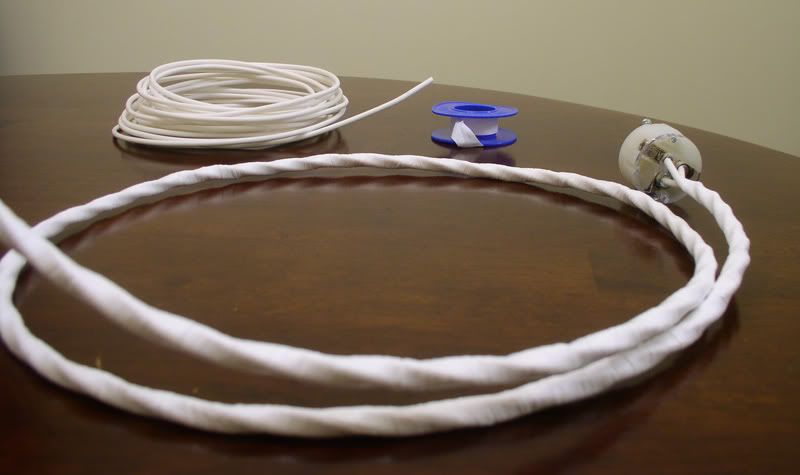
These conductors are then wrapped in PTFE (Teflon) tape. Rather than using the thin 1/2" plumbers tape that I've used in the past, I opted to source some thicker 1" PTFE tape to trim down the time on the wrapping process, as the cable gets wrapped a total of four times, it can take a while.


Initial two layers of 1" PTFE Tape


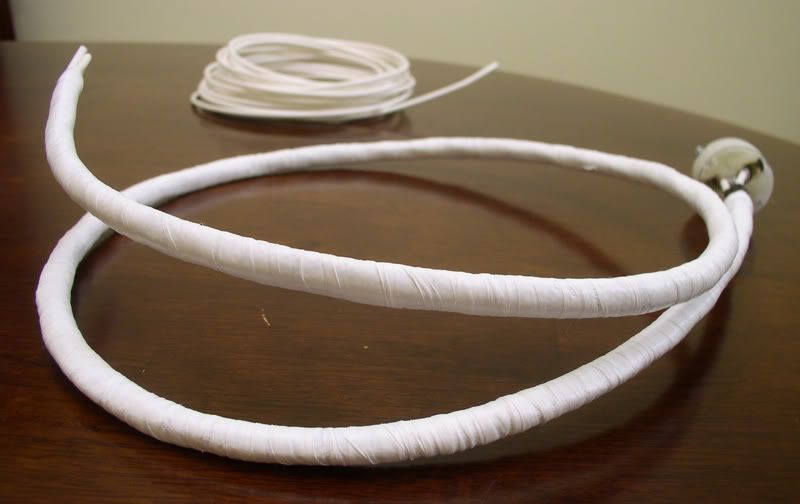
Once the teflon is wrapped around the three conductors, a layer of 3M EMI / RFI blocking 3M aluminum tape is wrapped around the cable. This is a full coverage shield, none of the cable underneath is visible once wrapped, and there is a decent amount of overlap.

3M EMI / RFI blocking tape layer (first shield)

After the foil shield is laid down, the tinned copper braid mesh is run over top of it, then a buss wire is wrapped around the shield and soldered at the source side. This acts as a drain wire and connects the shield conductivity to the ground at the power source.  


Tinned copper mesh shield layer (second shield)


Now, the two final layers of PTFE tape are wrapped around the cable. 


Final two layers of 1" PTFE tape


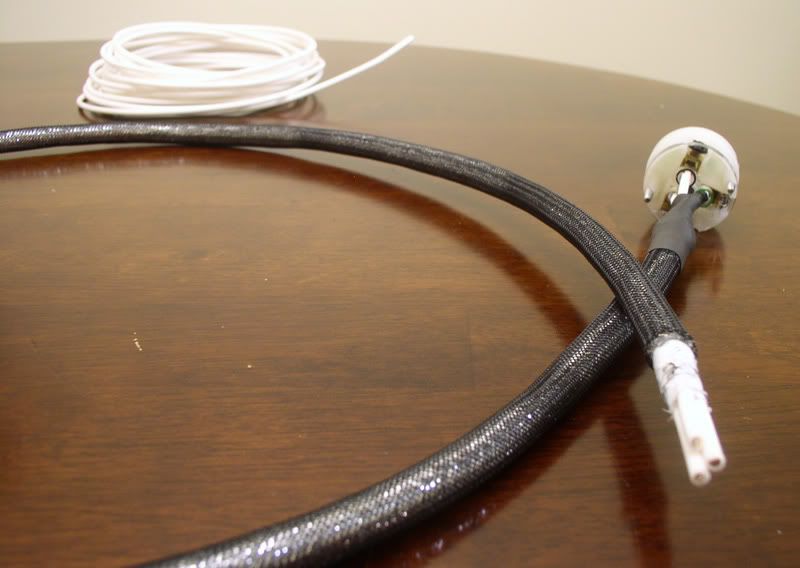
Then comes a layer of attractive nylon multifilament copper sleeving to cover up the bland looking PTFE tape, followed by black heatshrink at each end. The Marinco 3 prong connectors are screwed on each side, with enough force to keep them in place but not enough to strip the screws within. Here's a photo of the finished product:


The finished two shield 10 gauge power cable
Power and beauty in one! ;)

The Fine Print:
The above steps detailing the creation of a power cord are for entertainment purposes only, and not to be performed under any circumstances. Please remember that attempting to use homemade power cords can be dangerous to you and/or your surroundings. The owner of this blog and all associated parties can not / will not be held responsible if you attempt the process posted below and cause physical harm to yourself or your surroundings. Many electronics contain high voltages that can kill, and DIY power cables can be a fire hazard. Please keep this in mind.


July 18, 2011

Custom C7 Power Cable

If you're familiar with a standard IEC inlet, it has three separate connectors for hot, neutral and ground and is on nearly all audio equipment worth its salt, with a few exceptions of course. But we just can't be lucky enough that all equipment has an IEC three prong power inlet, can we?

Furutech gold IEC power inlet
Older equipment and certain newer universal disc players, among other things, have a C7 inlet. A C7 inlet does away with the safety ground connector, and is unpolarized, meaning that the hot and neutral is interchangeable as the cord can be aligned either way on the inlet. There are certain C7 connectors that are polarized which have a square end on one side and a circle on the other to ensure the hot and neutral go through the appropriate route.

Polarized C7 power cord
In my case, I'm currently building a Dynaco ST35 kit which combines the circuit ground with the chassis ground. When this is the case, there is a good chance for hum if attaching a preamp and amp on the same breaker if the circuit ground of each is attached to the safety ground of the power cords. Many of the forums I've visited recommend not attaching the chassis ground to the safety ground on the power connector to prevent hum on Dynacos. Please note that safety ground is called safety for a reason, if it's not connected and the circuit shorts to the chassis, it can be very unsafe.

I'm using a Shurter C7 inlet for my ST35, and it would be blasphemous for me to connect an ordinary C7 power cord to my tricked out new Dynaco ;)

Schurter C7 Power Inlet
So, what are the options for aftermarket C7 cables? PS Audio produces the 12 gauge Jewel power cord which is offered in a C7 configuration and runs ~$70-80 on the street, then there is the Audioquest NRG-1 power cord, which has a similar street price and comes in 16 gauge. Both are larger than the typical 18 gauge unshielded C7 power cord that comes with most equipment and are of course much more attractive.

In the interest of DIY, I chose to build my own. There are sparse few choices for a cable-end plug. Furutech offers a very attractive one, but at $45 as of this writing for a C7 plug is a little rich for my blood ;) It's also a little large for my purposes.

Furutech C7 power plug
Luckily, a builder in Japan offers a low cost C7 connector with solder connections that accept anything up to 16 gauge. These are floating around on that auction site if one searches for "C7 solder".

The power cord starts off a little differently than my other power cords. Rather than twist 10 gauge wires together in a spiral, I chose to use 16 gauge wire and braid it in a tri-braid configuration.

A bundle of 16 gauge silver plated copper in Teflon

Tribraided conductors
Then came the Teflon tape insulation, which covers the braided cable twice over.

Initial Teflon wrapping
A shield is then added over the top, which is connected to the source side ground via a soldered bus wire to create a floating shield.

Wrapped with a tinned copper mesh shield
The next step is two additional layers of Teflon are added to the top, over the braided mesh shielding.

Teflon wrapped 16 gauge power cord
Finally, the decorative techflex sleeving is added to the top, in this case both Chrome XC and black PET sleeving was employed to give a low-level shimmer. The low-cost Marinco 5266 is screwed down on one end and the C7 connector is soldered to the other. A piece of heatshrink is used as a strain relief, and in this case, the joint was bent at 90 degrees while the heatshrink was still hot for ample clearance behind the amp.

High quality DIY C7 power cord

Reverse shot detailing Techflex covering


The Fine Print:
The above steps detailing the creation of a power cord are for entertainment purposes only, and not to be performed under any circumstances. Please remember that attempting to use homemade power cords can be dangerous to you and/or your surroundings. The owner of this blog and all associated parties can not / will not be held responsible if you attempt the process posted below and cause physical harm to yourself or your surroundings. Many electronics contain high voltages that can kill, and DIY power cables can be a fire hazard. Please keep this in mind.


February 14, 2011

My Personal Recipe for a Right Angle Power Cord

I've made a couple of power cords using a right angle IEC so far, the first using a DHLabs 10/3 power cable that was a little thick for my liking, and didn't incorporate a shield. Unfortunately, it seems, a nice off-the-shelf, shielded power cable for DIY purposes is hard to come by for a reasonable price. So for my Bottlehead kit, I decided that I would make one from scratch that had the features I valued; namely teflon dielectric and a woven shield. I'll be detailing the steps I went through below in order to make this reasonably priced PC. This process did take hours though :P

The materials I used for this project are as follows:
  • 10 gauge silver plated copper in teflon (cost varies)
  • Marinco 8215 ($8.75, PartsConnexion)
  • Woven Shield (Percy Audio)
  • Schurter IEC Female 15A 250V 90 degrees PN: 4784.0100 ($4.95, PartsConnexion)
  • Black 1/4" Techflex (CableOrganizer / Wirecare)
  • Chrome XC 1/4" Techflex (CableOrganizer / Wirecare)
  • Black 1/2" Heatshrink (CableOrganizer / Wirecare)
  • Loctite Adhesive ($3, Home Depot)
  • 5 Rolls of Plumbers Teflon Tape ($5, Home Depot)


This cord was going to be four feet, so I trimmed three 10 gauge SPC in Teflon conductors and twisted them together by hand. I've seen people use a power drill to handle this process, but I wanted to be precise about it. A flat braid would have been more difficult to sleeve and insert into the Schurter IEC. The wire was then stripped to the appropriate length using the guide on the back of the Marinco plug, inserted and tightened with the screws around the circumference of the plug.


Now came the fun part, wrapping the cable with Teflon tape. This helps further isolate the shield from the conductors and helps maintain the cable geometry. Some would also say it adds damping. This is a long and boring process, so I like to have some music going in the background.


A woven tinned-copper shield was then sleeved over the cable. I used a smallish 22 gauge silver conductor I had handy to tie the shield to the source safety ground and soldered it in place. Electrical tape was then used to keep it stationary.


The cable was then wrapped with additional Teflon tape to flatten out the woven shield and isolate it.


I chose a combination of Techflex brand Chrome XC and black PET sleeving, mostly for decorative purposes. Techflex states on their page that the Chrome XC sleeving offers shielding, so a little bit extra certainly can't hurt.


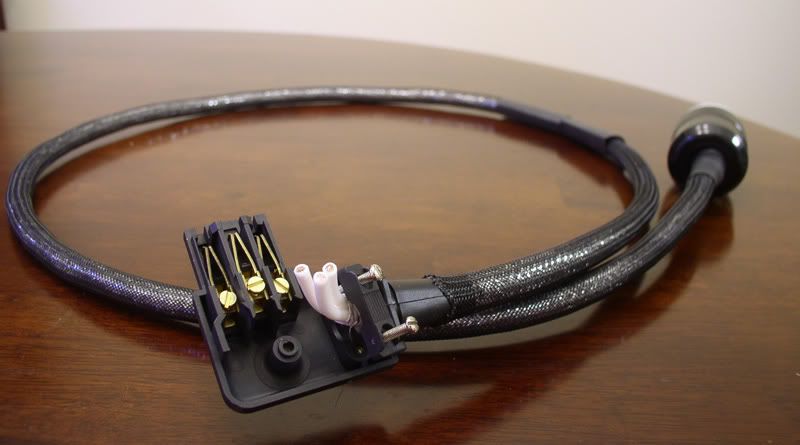
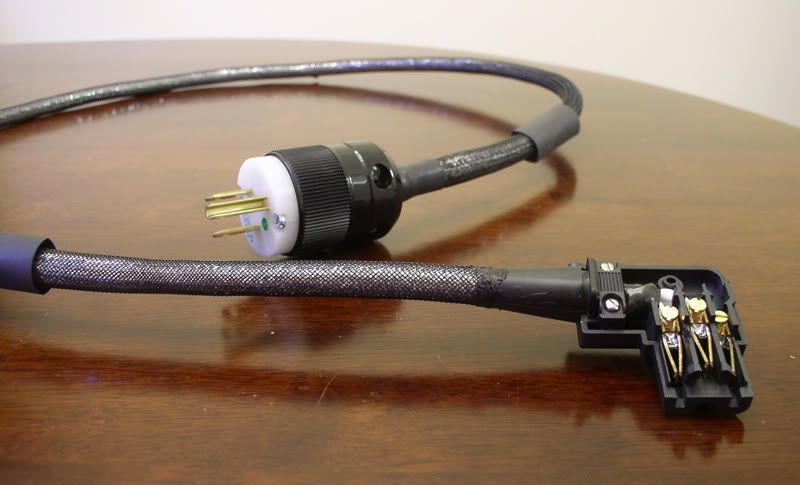
The Schurter IEC is then fitted. I've found this plug to be somewhat cumbersome to use, mostly because of the screw-hole that gets in the way of larger, stiffer conductors. Unfortunately, there are no other options that I know of for a decent right angle IEC. Also most boutique pre-made PC cable has a thick jacket that won't fit, so I've had to trim it at the boot and build up the area around the boot for a smooth appearance. The wires need to correspond to the way they are oriented on the plug, so a signal tester on my DMM was used as the wires aren't color coded.


I then stripped the wire, routed it into the sockets and screwed it in. Some solder was added using a hot setting (900 degrees) to ensure the wire would stay put if the screws loosened over time. The extra techflex was trimmed with a hot knife and melted to the boot. Some loctite was then placed in the area and two layers of 1/2" heatshrink were used as strain relief.


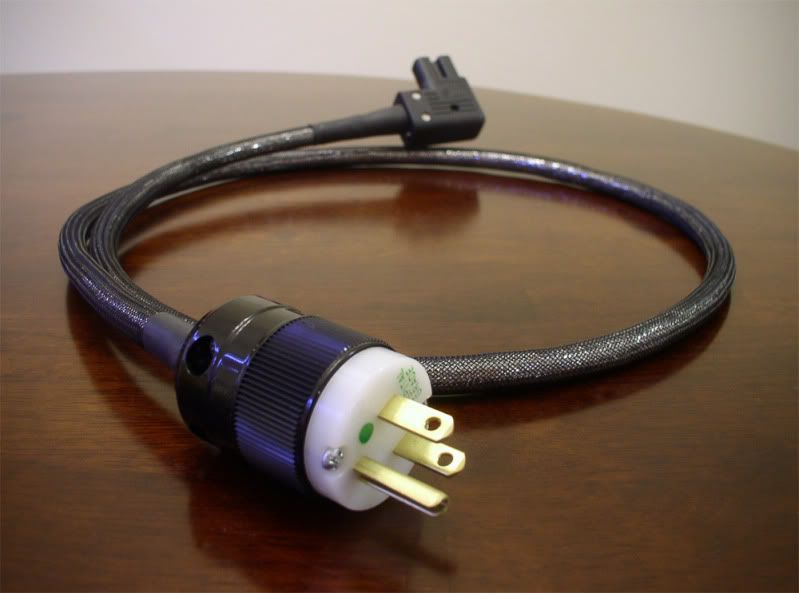
The final product. Came out rather nicely imho.

The Fine Print:
The above steps detailing the creation of a power cord are for entertainment purposes only, and not to be performed under any circumstances. Please remember that attempting to use homemade power cords can be dangerous to you and/or your surroundings. The owner of this blog and all associated parties can not / will not be held responsible if you attempt the process posted below and cause physical harm to yourself or your surroundings. Many electronics contain high voltages that can kill, and DIY power cables can be a fire hazard. Please keep this in mind.