Zynsonix Link

Showing posts with label Beyerdynamic. Show all posts

July 28, 2020

Removable Balanced Cable Mod for Beyerdynamic DT-1770 Headphones

I'm personally digging the newer, more upscale DT-1770 and DT-1990 from Beyerdynamic. The sound is more balanced and not quite as peaky in the upper midrange. The DT770, 880 and 990 are still incredible values though, and I'd recommend them to anyone looking to get into headphones. 

There's one glaring omission that Beyer could have done better with 1770 and 1990, and that's not using a 4-pin XLR with isolated grounds so the headphones could be run with balanced amps. For a headphone costing nearly $600 and given how little it would cost to implement is a strange business decision. Drop has actually released a version of the 1770 called the DT-177X which uses a 4 pin XLR, so I encourage anyone considering the DT-1770 to get that instead. 


3 pin XLR
3-pin XLR? That's no good!


Fortunately for Beyer fans, the existing units can be modified for balanced amplifiers. This involves removing the 3-pin XLR and much of the existing wiring and isn't very difficult. 

Below you'll see the offending 3-pin XLR which needs to be replaced. To open up the headphones, first the earpads are removed, then pry off the retaining ring using an envelope opener or similar tool. 

Beyerdynamic DT-1770 balanced cable mod 2


Under the retaining ring are the drivers. If you look carefully, there is a little indent on the outer edge of each. Using a small flathead screwdriver, you can apply some pressure to pry up the driver frame and remove it from the cups. This should all be done carefully as to not damage the drivers or the fabric on the driver frame. 

Beyerdynamic DT-1770 balanced cable mod 3


The drivers will often have a number on them. This is likely for matching purposes at the factory. In addition they will have a red dot near one of the wires. This tells you which side is positive. The wires can be trimmed and the drivers removed. Next the headband has to come off to replace the wire between the cups. There are a couple of screws to remove on the plastic brackets and you can then open up the headband and remove the wire. 


Beyerdynamic DT-1770 balanced cable mod 4


Other items that need to come off are the 3-pin mini XLR and the little strain relief pieces. The mini XLR has a plastic ring that screws it in place. There's a little bit of adhesive but it's not difficult to get off. The strain relieve pieces have a metal retaining piece, remove that and pull them out of the cup. They will need to be cleared out inside with a drill or dremel to provide clearance for thicker wire. 


Beyerdynamic DT-1770 balanced cable mod 5


Once everything is out, the replacement wire is soldered to a 4 pin mini XLR (Switchcraft or similar) and is fed through the strain relief pieces (orange circle below) through the headband and out the other side. The plastic pieces holding the headband in place have small indents where the wire enters and exits (red circle below). Inside, a zip tie should be placed right under the strain relief so the wire can't yank on the driver connection if it gets caught, and some light adhesive can be placed, then the metal retaining piece can be reinserted. 

Beyerdynamic DT-1770 balanced cable mod 6


Once everything is in place, you can insert the mini XLR back into the cavity on the bottom of the cup and screw on the stock plastic ring. Use a bit of adhesive or Loctite to ensure this does not come undone. 

Below you'll see the wire running to one of the headphone drivers. Beyerdynamic is now using small pins and a circuit board for ease of assembly. The pins are too small to solder to directly, so the wire should be soldered close to the board with a little bit of room for flexibility. Adhesive heatshrink should be used to prevent shorting. 

If you decide to try and remove the pin jacks and solder directly to the PCB, be very careful as you can damage the diaphragm wire which is quite thin. I personally do not recommend this as you'll likely find yourself buying a new set of drivers, but if you'd like to try it, godspeed. 
 

Beyerdynamic DT-1770 balanced cable mod 7


Once you have everything in place, you can reassemble the headphone. Below you'll see the modded DT1770 Pro (sans earpads, they were retained by the owner) and a spiffy new Zynsonix Ballista cable to go with them. 


Beyerdynamic DT-1770 balanced cable mod 8

Beyerdynamic DT-1770 balanced cable mod 9

Beyerdynamic DT-1770 balanced cable mod 10


I hope you enjoyed this brief tutorial and hope your mod goes well. If you'd prefer someone else have all the fun, please contact Zynsonix Audio who would be happy to handle it for you. 


Disclosure: Please remember that using a soldering iron and/or modifying headphones can be dangerous to you and/or your surroundings and should only be performed by a certified technician. The owner of this blog and all associated parties can not / will not be held responsible if you attempt a modification posted above and cause physical harm to yourself or your surroundings. 

May 5, 2015

Beyerdynamic Balanced Removable 4 Pin Mini XLR Mod

A client recently sent me one of my favorite headphones to modify, a Beyerdynamic DT770. The DT770, DT880, DT900, and similarly the T1, T5p, T70, and T90 are all intuitive to work with and respond well to new cables and mass loading.

Beyerdynamic DT770 - Pro 80 ohm version

This DT770 would be getting a removable cable mod, which includes the installation of a mini XLR in the headphone cup so the cable can easier be removed for transport or to perhaps have separate cables for portable and home use. The DT770 has room for a mini XLR jack on both the left and right cups, however this user preferred the simpler single ear input. Since I was already going through the trouble, I wired the headphone for balanced operation just in case he ever switches over to balanced listening in the future. The great thing about mini XLR jacks is they lock, so no need to worry about them slipping out like a 3.5mm or 2.5mm. Also, TRS connectors can loosen over time, however this is not as likely with the mini XLR connectors.

Below is a look at the interior driver. As you can see, the DT770 driver is unique in that it has a felt and plastic ring encircling the center, which reduces the sound wave reflection inside the cups.

DT770 driver and felt/plastic ring


Because the felt and plastic circle reach the plastic backing of the cups, any added mass damping should be clear of interaction. Below you'll note the Dynamat Xtreme installed is a small circle which is measured to fit neatly inside the cup and not cause any clearance issues with the driver. 


Dynamat Xtreme used as mass loading


Beyerdynamics used to come with a round hole, but it's square now that they've revised the manufacturing to some extent. I carefully increased the size of the hole diameter toward the round side of the cup with a Dremel to prevent the plug from getting in the way of the driver. The hole does not have to be absolutely round as the ridge on the mini XLR plugs will cover minor imperfections. 

Dremeled hole for 4 pin XLR mini jack


A three or four pin mini XLR jack can be used. In this case I used a four pin as I wanted the user to be able to upgrade to balanced down the line if he wanted, but in other cases, a three pin can be used as the ground is wired shared as default. Please note the position of the jack, if it is not close to the rounded edge like this is, the driver will not fit back in. Dremeling down the metal casing of the jack where it meets the driver may help a little bit, but will reduce the integrity of the jack if too much is taken off. 

Nice, clean fit


Wire should be run from one side of the headphone to the other as this is going to be single entry. A twisted pair of Zynsonix Xev silver clad wiring is prepped and sleeved with black polyolefin heatshrink tubing. 

Wire to run from one cup to the other


This can be wired however the user prefers, however I used the XLR standard (pin 1 = left +, pin 2 = left -, pin 3 = right +, pin 4 = right -). 

Wired with Zynsonix Xev silver clad wire


Before re-installation, the driver solder tabs are cleaned of the stock solder.

Solder tabs cleaned of original solder


The new Zynsonix Xev wires are installed using fresh Cardas silver content solder and the felt/plastic cups re-installed. 

Driver wired up and ready


The foam is reseated on top of the drivers and the earpads are reinstalled, so we have a nice clean 4 pin mini XLR input on our Beyerdynamic DT770 now. 

Installation of mini XLR jack complete

And finally we have the finished product featuring some cool colors, in this case rust with a black accent, terminated with a Switchcraft gold plated mini 3.5mm plug and a Neutrik / REAN mini XLR. Now these old Pros are ready for some stylish listening! 


I hope you enjoyed this post, please contact Zynsonix if you have a pair of Beyerdynamics (or any other headphone) that you'd like recabled or modified.

For more full-sized Beyer headphone mods, check out the Beyerdynamic T5p Recable and the DT880 Recable.


The Fine Print:
The above steps detailing the modification and re-cabling of a headphone are for entertainment purposes only and not to be performed under any circumstances. The owner of this blog and all associated parties can not / will not be held responsible if you attempt the process posted and cause physical harm to yourself, your surroundings or your property. Please keep this in mind.

March 28, 2014

Recabling the Beyerdynamic Tesla DT-1350 Portable Headphones

Beyerdynamic has a number of different headphones featuring Tesla drivers now. Some are very impressive, like the Beyer T-1 and T-5p (see my recable of the T-5p here) and some aren't really my cup of tea, such as the Beyer T-70 with what I perceived to be a bright and peaky sound signature. So if you are considering purchasing one of the Beyerdynamics with Tesla drivers, to audition it before purchase if you can. In this post I will be recabling the Beyerdynamic DT-1350 portable headphones with Tesla drivers.

Like all Beyerdynamic headphones I've ever used, the DT-1350 is robustly built and designed to withstand many hours of use. The headphone splits in the center, much like the Sennheiser HD25-1 II headphones, for additional adjustment and comfort. The drivers have an 80 ohm impedance, so a headphone amp can be beneficial to bring out the best in these. Overall, I would say that the sound very clear, coherent, and is more concentrated on the higher end of the spectrum, more treble-oriented with a bit less bass quantity than I'd desire. I could see the similarity in signature to the DT880 250ohm headphones, which many audio enthusiasts enjoy for their even-handed presentation.

So in order to add a little warmth and bass to the equation, I decided to recable the DT1350s with Cardas internally litzed wiring. The Cardas 2x23.5 is a great size for portable headphones when you don't need balanced operation. It's relatively flexible and thin for an aftermarket cable. I also chose to use an Oyaide rhodium plated plug (see here for a 3.5mm plug rundown) as it works great with portable devices such as a phone with a case on it due to the slim barrel.

Oyaide Rhodium Plug and Cardas wiring

The end of the wire is stripped revealing two 23.5 gauge conductors and a shield which will be used for the ground (also called return). You'll note the Oyaide connector has teensie-tiny soldering areas, so care is required to ensure there is no shorting of the left and right channels or melting of the dielectric.

Stripped Cardas Wiring

As you can see, the Cardas wire fits perfectly in the thin barrel of the Oyaide connector, no drilling or dremmeling was required. 


With the cable ready for installation, the Beyerdynamic cups would be opened. The pads are held on with a sticky tack that goes around the outer circumference. In my experience, they can be pulled off with a bit of force and reinstalled without losing the tackiness, although I'm sure if removed multiple times, they would need to be replaced, or some sort of double sided tape might need to be installed.

Examining the interior, the Tesla driver is hiding under this white plastic shell, so not quite as fancy as the interior of the T5p. The wiring attaches to a small solder board, which allows the ground to be split, and would potentially protect the driver solder pads if there was some major yanking on the wire.

Beyerdynamic DT1350 with driver exposed

Installing the Cardas wire requires the existing wire entry area to be Dremelled slightly to accomodate the larger cable. Holding it in place is a pair of miniature zip ties and epoxy to ensure that when the wire is pulled, it will not damage the solder joints inside the cup. Heatshrink is used to provide some additional strain relief. The wire is soldered to the solder pad that distributes the different channel signals and ground to each of the earcups. 

Note the soldering pad near the top of the cup


After the soldering work is complete, the driver is returned to its original position.


The tacky pad is replaced on the headphone cup and the recable is now complete. 

A complete DT1350 with Cardas cable

If you'd like to purchase a new pair of pads for the DT1350, Beyer offers original replacements (of course) and they have some suede-type pads which some people find more comfortable for longer listening sessions. That part number is 908363 and can be purchased from Beyerdynamic USA. 

Suede Pads from Beyerdynamic

The DT1350s come with a very nice traveler case, and the recabled version fits inside just fine. 


So after performing the recable, the DT1350 has what I would perceive to be a warmer and deeper sound signature. It doesn't rival the Amperiors or HD-25 aluminums for bass quantity, but it has a nice, palpable midrange and upper treble presentation that other headphones can't match. 


The Fine Print: The above steps detailing the recabling of a headphone are for entertainment purposes only, and not to be performed under any circumstances. The owner of this blog and all associated parties can not / will not be held responsible if you attempt the process posted and cause physical harm to yourself, your surroundings or your property. Please keep this in mind.


March 4, 2013

Beyerdynamic T5P Recable

Beyerdynamic is a family-owned audio equipment manufacturer based in Germany that produces headphones, microphones and wireless audio systems. The headphones produced by Beyer feature great build quality and the sound produced by their top-tier headphones is something the discerning audiophile can really appreciate. The DT770, DT880 and DT990 models are ideal choices for the listener on a budget, and if one likes what they hear, there are the pricier Tesla-based models that Beyer introduced over the last four or so years: the T1, T5p, T50p, T90 and T70.

Beyer's Tesla lineup

The Tesla nomenclature comes from the redesigned transducers that achieve efficiency values of over one Tesla, which is the unit of measurement for magnetic flux density. This provides the listener with nearly double the volume at the same input level as typical headphones. Also unique to the Tesla line are the drivers which are angled toward the listeners ear.

Today I'll be recabling the luxurious Beyer T5p. The T5p is effectively the mobile version of the T1 (The "p" standing for portable) and with it comes a few changes, including a short 4 foot cord and a 32 ohm impedance which can be driven easily from sources like the iPhone / iPod and other portable music players, and leather pads to help attenuate outside noise.

Beyerdynamic T5p

Something I've found with some Beyer headphones (especially the DT880 / 250ohm) is the upper-midrange can cause me ear fatigue over long listening sessions. This certainly doesn't affect everyone, but a few other people with sensitive ears have mentioned the same finding to me. I've found the best remedy for this is to recable the headphone with Cardas enameled copper wire, which effectively warms up the sound signature and subtly rolls off those frequencies which I personally find fatiguing.

Cardas copper wire

The first step is to braid the Cardas copper wire in a litz-braid. I've chosen three different colors in this case, red for right signal, blue for left signal and black for ground.

Braided Cardas wire

The cable is then sleeved with the soft black nylon multifilament sleeving. You'll notice below that electrical tape is over the ends of the wire, this prevents the small conductors from snagging the sleeving while they are fed through by hand. 

Sleeved with black nylon

Once the leather earpad and sealed ring are removed, that gives access to the driver housing. Note the angled driver in the photo below. 

The T5p angled driver

Take a look below at the beautifully machined Tesla driver housing, I've never seen anything like it. 

T5p Telsa driver backside

The existing wire and solder is removed. This is done using as low a temperature as possible as to not damage the delicate drivers. Next the Cardas wire is prepped. The Cardas wire is enameled, so it has to be either dipped in a solder pot or heated up with solder on the tip on an iron to tin it and remove the enamel. Once appropriately tinned, it is soldered in place. 


Cardas wire soldered in place

Once the wire is soldered in place, a stain relief system and adhesive is used to keep the wires in place (and helps prevent the tugged cable from yanking on the solder tabs). The headphone is then put back together with extra attention paid to the sealed ring (the seal is very important to the sound). Below is the completed product. 

Recabled T5p

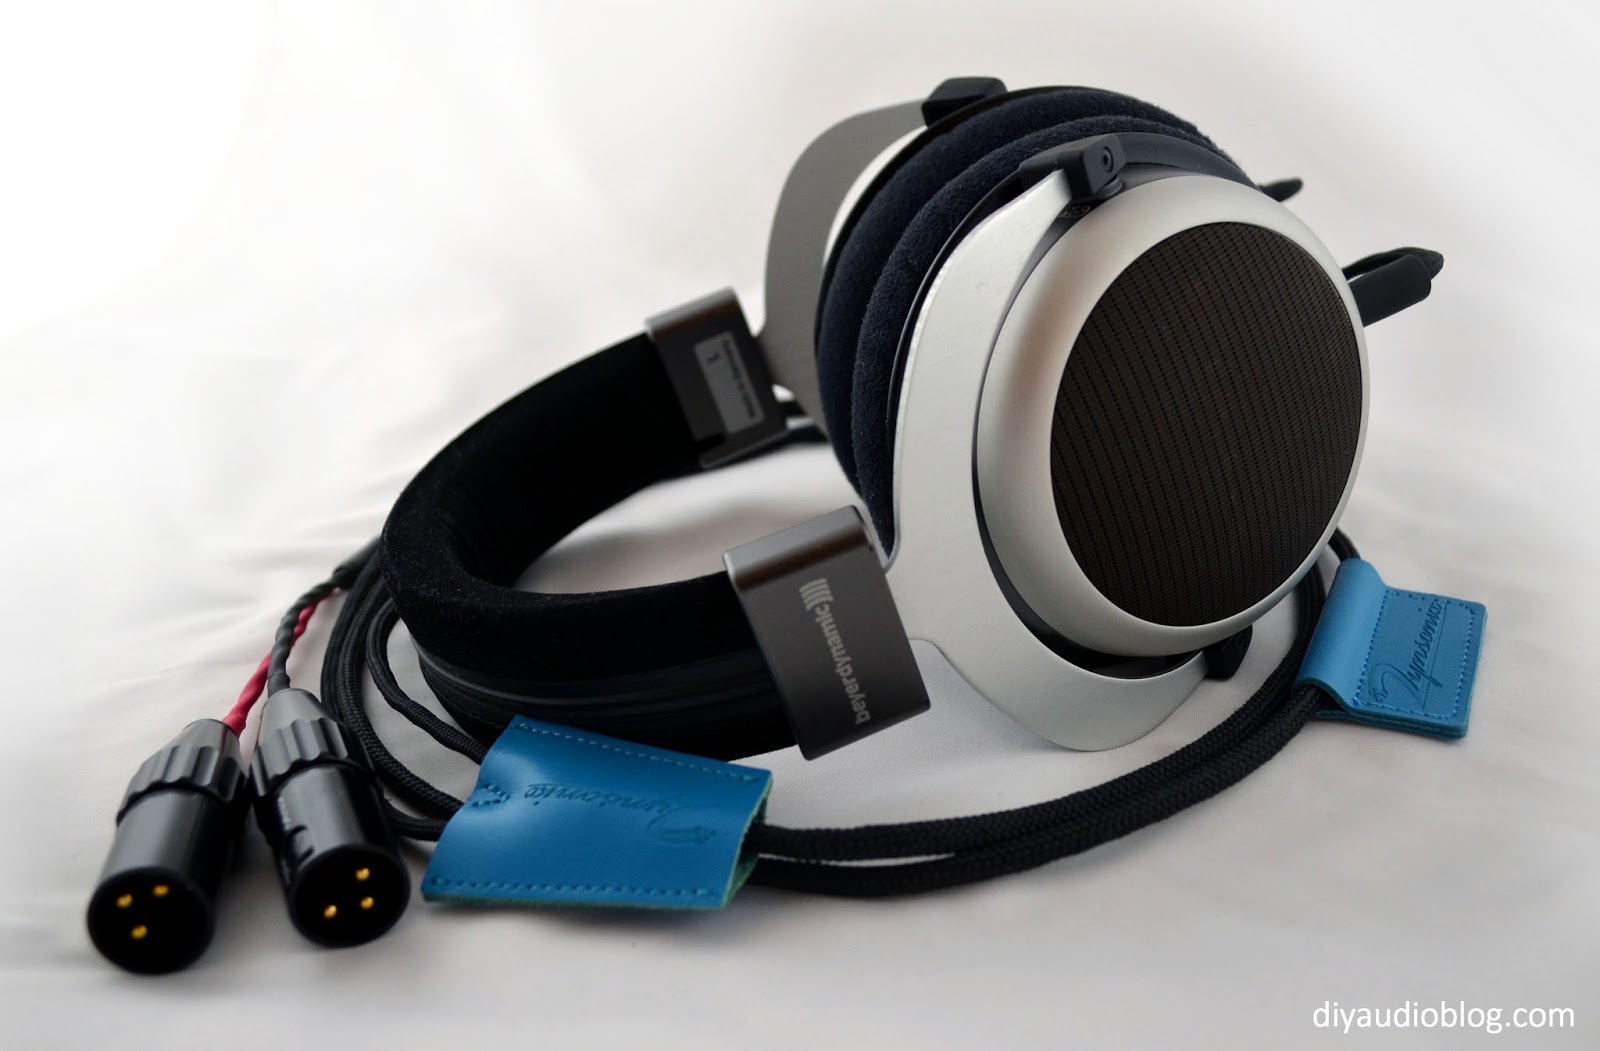
The T5p has a incredibly clear, detailed and coherent sound signature. Color me impressed. I hope you enjoyed this post, if you'd like to have your headphones recabled, please contact Zynsonix for a quote. Since Beyerdynamic T1, T5p, T70 and T90 are all quite similar, the same mods /recables can be performed on all of them. Here is a Beyer T90 that has been recabled for balanced listening with dual XLRs.

Beyerdynamic T 90 balanced with dual XLRs


The Fine Print:
The above steps detailing the recabling of a headphone are for entertainment purposes only, and not to be performed under any circumstances. The owner of this blog and all associated parties can not / will not be held responsible if you attempt the process posted and cause physical harm to yourself, your surroundings or your property. Please keep this in mind.


December 6, 2011

Recabling a Pair of Beyerdynamic DT880 Headphones

Beyerdynamic is a family-owned audio equipment manufacturer based in Germany that produces headphones, microphones and wireless audio systems. The headphones produced by Beyer are very solidly made, I'd imagine the rugged designs have the travelling DJ in mind. Still, the sound produced by Beyerdynamics top-tier headphones is something the discerning audiophile can really appreciate. The DT770, DT880 and DT990 models are ideal choices for the listener on a budget, and if one likes what they hear, there are pricier Tesla-based models that Beyer has recently introduced, namely the T-1, T-5p, and T-70.

The Beyer DT770, DT880 and DT990
The differences between the 770, 880 and 990 are surprisingly not subtle. The DT880 tends to be the most chosen for neutral listening, it is a semi-open design and has the most well-balanced presentation of the three headphones. The DT770 and DT990 are much more bassy, with the heaviest bass response coming from the closed DT770. The fully-open DT990 seems to have slightly less bass and a wider soundstage than the 770. I personally think that the 770 is the ideal movie and gaming headphone, the 880 is the best for analytical listening, and the 990 is good for audio enthusiasts who need a fun-to-listen-to headphone that matches a typical speaker system's bass response. 

While the sound of each headphone varies, the process of recabling them is nearly identical. Aside from the driver and cup design, the headphones appear to be identical inside and out. For this post, I will be recabling the Beyerdynamic DT880 headphones. Below is a stock DT880.

The Beyerdynamic DT880 Headphone

The wire for recabling a Beyer and still keeping the single-entry look takes a little bit more care than a typical headphone cable. When braiding, the wire should go from a litz braid to two twisted pairs about 2 and a half feet from the end. One of these pairs is nearly trimmed off, only leaving enough wire to get to the driver within the cup. The other twisted pair will be run through the headband. 

The braided Beyerdynamic cable
The wire is then sleeved and the long twisted pair gets some heatshrink to distinguish each side. 

Sleeved Cable

Then a four pin Neutrik connector is attached for balanced operation. If you are interested in reading more about 4 pin balanced connectors, please check out my post creating a 4 pin to TRS adapter cable. 

Cable terminated with a Neutrik 4 Pin XLR

Now that the cable is ready, the first step to getting inside the headphones is to remove the velour pads. These pads stretch over the frame of the cup, so there are no screws to remove, etc. You will notice a number of perforations on the inside of the pads, these holes make a big difference in the sound, covering them adds unwanted reverberation. If one replaces the velour pads with leather, it is preferable (in my humble opinion) to get the leather pads with the perforations inside. 

DT880 pads removed from the cups

The next piece is removed using a typical envelope opener to pry the plastic ring out of the cups. The plastic ring retains the driver and driver surround. Once it has been removed, one has access to the driver terminals. 

DT880 driver and driver terminals

There is generally a marking on the driver to determine the positive side. In this case it is a yellowish gold mark. I take the time to use a multimeter and verify this is the case before snipping off the stock wires. The left driver has three terminals, the center is the right signal which is not electrically connected to the driver but the wire that runs across the headband is connected to this terminal. The ground is also run from the ground of the left driver to the right driver. This is all removed and ignored as dedicated wires will be run directly to the drivers in the recable. This will remove unnecessary solder joints in the signal path and isolate the ground for balanced operation. Below is a photo of the shell of the DT880 stripped and ready for the recable. 

Beyer DT880 Shell

The latest models of the 770, 880 and 990 have a square opening that the stock wire is fed into, This square hole needs to be dremelled out so that it is round, then heatshrink built up on the new cable for a perfect fit. A custom retaining system is set in place to keep the cable from being tugged out of the cup. 

Wires soldered to the DT880 driver

The wire is soldered to the driver terminals with the assistance of engineer helping hands. The wire is then fed through the little grommet to the other cup. The headband is now placed over the wire and sealed back up using the zip-lock bag type mechanism. 

The wire is fed through the little grommets in the cups
The second driver is soldered on the same way, and we have a complete headphone!

Completed headphone

This headphone also has a balanced to single ended adapter so it can be used with both types of amps. 

Another angle
I hope you enjoyed reading this post. If you'd like your Beyerdynamic headphones (or any other headphones) by an experienced recabler with some excellent sounding cable, contact Zynsonix. Since the 770, 880 and 990 are all quite similar on the inside, each can be modded / recabled the same way. Here's a Beyerdynamic DT990 PRO with a recable with both a standard mini and a Pono output to maximize utility out on the road. 


Beyerdynamic DT990 modded with new cable, mini and pono connectors


The Fine Print:
The above steps detailing the recabling of a headphone are for entertainment purposes only, and not to be performed under any circumstances. The owner of this blog and all associated parties can not / will not be held responsible if you attempt the process posted and cause physical harm to yourself, your surroundings or your property. Please keep this in mind.