Zynsonix Link

Showing posts with label Cardas wire. Show all posts

March 4, 2013

Beyerdynamic T5P Recable

Beyerdynamic is a family-owned audio equipment manufacturer based in Germany that produces headphones, microphones and wireless audio systems. The headphones produced by Beyer feature great build quality and the sound produced by their top-tier headphones is something the discerning audiophile can really appreciate. The DT770, DT880 and DT990 models are ideal choices for the listener on a budget, and if one likes what they hear, there are the pricier Tesla-based models that Beyer introduced over the last four or so years: the T1, T5p, T50p, T90 and T70.

Beyer's Tesla lineup

The Tesla nomenclature comes from the redesigned transducers that achieve efficiency values of over one Tesla, which is the unit of measurement for magnetic flux density. This provides the listener with nearly double the volume at the same input level as typical headphones. Also unique to the Tesla line are the drivers which are angled toward the listeners ear.

Today I'll be recabling the luxurious Beyer T5p. The T5p is effectively the mobile version of the T1 (The "p" standing for portable) and with it comes a few changes, including a short 4 foot cord and a 32 ohm impedance which can be driven easily from sources like the iPhone / iPod and other portable music players, and leather pads to help attenuate outside noise.

Beyerdynamic T5p

Something I've found with some Beyer headphones (especially the DT880 / 250ohm) is the upper-midrange can cause me ear fatigue over long listening sessions. This certainly doesn't affect everyone, but a few other people with sensitive ears have mentioned the same finding to me. I've found the best remedy for this is to recable the headphone with Cardas enameled copper wire, which effectively warms up the sound signature and subtly rolls off those frequencies which I personally find fatiguing.

Cardas copper wire

The first step is to braid the Cardas copper wire in a litz-braid. I've chosen three different colors in this case, red for right signal, blue for left signal and black for ground.

Braided Cardas wire

The cable is then sleeved with the soft black nylon multifilament sleeving. You'll notice below that electrical tape is over the ends of the wire, this prevents the small conductors from snagging the sleeving while they are fed through by hand. 

Sleeved with black nylon

Once the leather earpad and sealed ring are removed, that gives access to the driver housing. Note the angled driver in the photo below. 

The T5p angled driver

Take a look below at the beautifully machined Tesla driver housing, I've never seen anything like it. 

T5p Telsa driver backside

The existing wire and solder is removed. This is done using as low a temperature as possible as to not damage the delicate drivers. Next the Cardas wire is prepped. The Cardas wire is enameled, so it has to be either dipped in a solder pot or heated up with solder on the tip on an iron to tin it and remove the enamel. Once appropriately tinned, it is soldered in place. 


Cardas wire soldered in place

Once the wire is soldered in place, a stain relief system and adhesive is used to keep the wires in place (and helps prevent the tugged cable from yanking on the solder tabs). The headphone is then put back together with extra attention paid to the sealed ring (the seal is very important to the sound). Below is the completed product. 

Recabled T5p

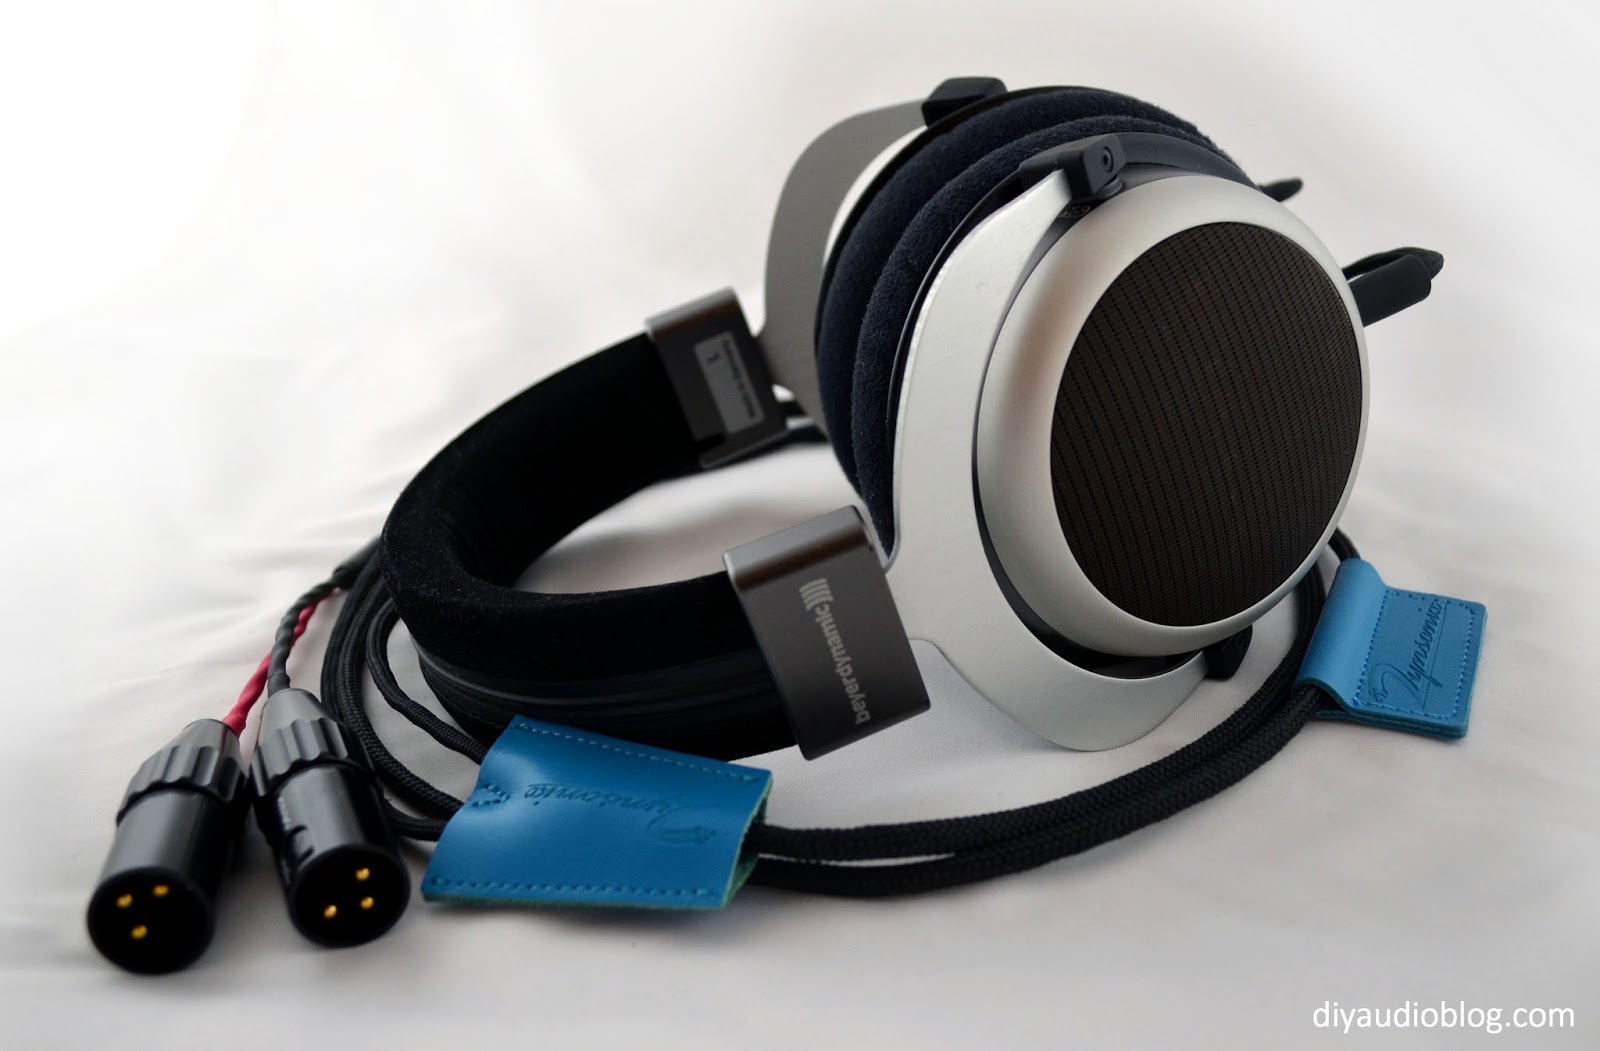
The T5p has a incredibly clear, detailed and coherent sound signature. Color me impressed. I hope you enjoyed this post, if you'd like to have your headphones recabled, please contact Zynsonix for a quote. Since Beyerdynamic T1, T5p, T70 and T90 are all quite similar, the same mods /recables can be performed on all of them. Here is a Beyer T90 that has been recabled for balanced listening with dual XLRs.

Beyerdynamic T 90 balanced with dual XLRs


The Fine Print:
The above steps detailing the recabling of a headphone are for entertainment purposes only, and not to be performed under any circumstances. The owner of this blog and all associated parties can not / will not be held responsible if you attempt the process posted and cause physical harm to yourself, your surroundings or your property. Please keep this in mind.


November 30, 2011

A Custom Audeze Balanced Headphone Cable

Anyone who has their hands close to the pulse in high-end headphones has heard of the Audeze. Formed in 2009, they have quickly developed a superb reputation for their planar magnetic headphones, the LCD-2, and very recently the LCD-3. Both headphones make use of a very convenient removable cable mechanism employing a pair of mini 4 pin XLR connectors. Switchcraft makes these for about $8 a piece, and you can find generics for less than half of that. As previous experience dictates; Switchcraft's connectors generally prove to be reliable over time, so I'll be sticking with those for this build. The male and female mini XLRs come in a variety of opening sizes to accommodate different cables. For the females that will be needed for the Audeze cable, the small opening version is the TA4F, and the larger opening is the TA4FLX. Below are photos of the TA4FLX.

The Switchcraft TA4FLX 4 pin mini XLR female

Since each driver only needs a signal and ground, and each mini XLR has four pins, the pins are shorted so that the signal uses pins 1 and 4 and the ground uses 2 and 3, as seen in the below diagram.


These tiny little solder tabs require care to solder to and see the numbers associated with each pin. A lamp can be very helpful to get a good look at the connector while working with it. Neotech UP-OCC copper was used to short the pins below. 

Shorted Switchcraft mini XLR pins

Now comes the time to braid the wire for the cable. The process is started by trimming four identical lengths of wire, then braiding it in a litz up until around 18 or so inches from the end. The last bit of wire is split into two twisted pairs, on for each cup. This particular cable will be made using Cardas litz copper wire in Teflon. Cardas litz wire is a number of different gauges of wire, each covered in enamel that needs to be melted away with hot solder (a solder pot is especially helpful). This needs to be done for each end that is stripped.

Braided Cardas litz wire in Teflon

The wire is now sleeved with black nylon multifilament, 1/8" for the twisted pairs and 3/8" for the four wire litz. A ViaBlue splitter was placed over the "Y" split of the cable to give it a sleek look. If you'd like more details about the ViaBlue SC-2 splitter, please read my post regarding a ViaBlue Mini to RCA cable build. 

Prepped and sleeved cable

Since the wires are all the same color, it can be beneficial to color code them to later reference. Hardware stores carry electrical tape in a variety of colors. Typically ground connectors are labelled green, right signal is red, and left is black or white. This isn't always the case, but one can choose a convention for themselves and stick with it. It prevents one from having to pull out the multimeter too often. 

Labelled wires

This headphone cable is going to be balanced, for a balanced amplifier. There isn't an "official" balanced headphone connector, but there are two methods that are the most common; a dual-three pin XLR where only two of the three pins on each connector are used, and a four pin XLR where all four pins are used. This is discussed in greater detail in an earlier DIY Balanced Adapter Cable post.  I'm personally of the opinion that a 4 pin XLR should be used; it's a cleaner, easier cable to produce and a lot less heavy if using a balanced to single-ended adapter. The wire is now soldered in place. The typical wiring configuration for a 4 pin XLR is as follows:

Pin 1 - L+
Pin 2 - L-
Pin 3 - R+
Pin 4 - R-

A piece of heatshrink holds the nylon sleeving in place, and the strain relief grip is placed under the 4 pin connector.

4 Pin Neutrik male XLR connector

The metal sleeve is slipped on top of the 4 pin connector and the plastic strain relief grip is covered by the bottom piece which screws in place, creating a strong grip on the heatshrink and nylon sleeving. 

4 Pin XLR attached


The Switchcraft 4 pin mini XLRs are then soldered in place. As mentioned above, the signal uses pins 1 and 4 and the ground uses 2 and 3. The cable is now complete.

Completed Audeze LCD-2 cable

A balanced adapter was constructed so the headphone could be used with single-ended amplifiers. If you'd like to read how this was constructed and learn a little more about balanced headphone operation, visit the Balanced to Single Ended Adapter Cable post.

Completed cable with balanced adapter

Also built for the Audeze LCD-2 was an identical cable using Kimber TCSS copper in Teflon wire. The Audeze has what I would consider a warmer and more laid-back presentation. The Kimber wire helps bring it forward a little bit without being harsh.


Balanced cable for Audeze headphones w/Kimber wire

If you are looking for your own custom made Audeze LCD-2, LCD-3, or LCD-X cable, Contact Zynsonix Audio for a superb sounding Trebuchet Audeze headphone cable, made with 99.99997% pure, custom ohno cast copper.


Zynsonix is an authorized dealer for Audeze headphones which include not only a full factory warranty, but a free Trebuchet headphone cable. Contact Zynsonix for details.


The Fine Print:
The above steps detailing the building of a cable are for entertainment purposes only, and not to be performed under any circumstances. The owner of this blog and all associated parties can not / will not be held responsible if you attempt the process posted and cause physical harm to yourself, your surroundings or your property. Please keep this in mind.


November 29, 2011

A Balanced to Single-Ended Heaphone Adapter Cable

Balanced circuits have been around for quite some time, but the first commercially available balanced drive headphone amp was created by Headroom nearly ten years ago. Balanced drive doubles the slew rate and voltage swing available from a circuit and reduces distortion. For balanced headphones, it also eliminates the ground connection between the left and right drivers, preventing crosstalk. There are many headphone amp manufacturers producing balanced headphone amplifiers now, including Ray Samuels, Eddie Current and Bottlehead just to name a few.

There isn't an "official" balanced headphone connector, but there are two methods that seem to be the most common; a dual-three pin XLR where only two of the three pins on each connector are used, and a four pin XLR where all four pins are used. Headroom, being the first to market with their balanced headphone amplifier, went with a dual-three pin XLR. Many manufacturers offer both options. I'm personally of the opinion that a 4 pin XLR should be used; it's a cleaner, easier cable to produce and a lot less heavy if using a balanced to single-ended adapter. 

The Eddie Current Balancing Act Features both 3 and 4 pin connections

Headphones, in order to be balanced, require a complete recable or a retermination if the left and right ground are isolated from one another. Balanced to single-ended adapters are used when someone has had their headphone recabled or terminated to a balanced connection but wants to listen to a single-ended headphone amplifier. In the case of the 4 pin, it's a 4 pin XLR connector to a TRS cable. This cable connects the two grounds to the Sleeve, the "S" of the TRS (TRS stands for Tip, Ring Sleeve). 

In this post, I will be creating a 4 pin XLR connector to a TRS cable using a 4 pin gold Neutrik XLR jack, a Furutech TRS (FP-704 G) and some Cardas litz wire in Teflon. It doesn't appear that there are any boutique 4 pin XLRs at the time of this writing, but the Neutrik 4 pin should not be discounted, it is very well made and solid.

My adapter cables are typically one foot in length, they can be less, but the connectors themselves are large and there should be appropriate space between them so the cable has plenty of room to bend. The process is started by trimming four identical lengths of wire. Cardas litz wire is a number of different gauges of wire, each covered in enamel that needs to be melted away with hot solder (a solder pot is especially helpful). Each length of wire is stripped at the end, the enamel melted away, and soldered to the solder tabs on the 4 pin XLR. One can cover the solder tabs with heatshrink to be extra anal ;)


The wire is then braided into a litz configuration in preparation for sleeving. 


3/8" Black Nylon multifilament sleeving is trimmed with a hot knife and slipped over the braided wire. Two pieces of heatshrink holds the nylon sleeving in place, and the strain relief grip is placed under the 4 pin connector. 


The metal sleeve is slipped on top of the 4 pin connector and the plastic strain relief grip is covered by the bottom piece which screws in place, creating a strong grip on the heatshrink and nylon sleeving. 


A logo'd piece of heatshrink is added underneath the existing piece so it will be exposed under the Furutech connector. The other side of the wires are stripped and tinned with solder. 


The Furutech TRS is dissasembled in preparation to be attached to the cable, you'll see the four pieces below.


The wire is now soldered in place. The typical wiring configuration for a 4 pin XLR is as follows:

Pin 1 - L+
Pin 2 - L-
Pin 3 - R+
Pin 4 - R-

Therefore pin 2 and 4 are connected to the sleeve of the Furutech, pin 1 the tip (left channel), and pin 3 the ring (right channel). The plastic strain relief grip is set in place under the TRS and the metal top and bottom are slipped in place.


The metal top portion of the connector compresses the strain relief grip, the bottom metal portion can now be screwed in place. 


The cable is now complete and is checked with a multimeter for continuity and resistance. 


I hope you enjoyed this step-by-step process of building a balanced to single-ended heaphone adapter cable. Zynsonix can build you one just like it or one built to your specifications.

The Fine Print:
The above steps detailing the building of a cable are for entertainment purposes only, and not to be performed under any circumstances. The owner of this blog and all associated parties can not / will not be held responsible if you attempt the process posted and cause physical harm to yourself, your surroundings or your property. Please keep this in mind.