Zynsonix Link

Showing posts with label DIY electronics. Show all posts

February 22, 2011

Using Silver Plated Copper for Speaker Cables

We've all seen the restrictively expensive speaker cables out there on the market. Most of them look incredibly awesome and have sophisticated, patented geometry, but sometimes you'll notice that there was some scrimping done with the quality of the conductors. When you're paying good money for cables, why settle for Polyethylene or Poly-Vinyl-Chloride (PVC) dielectric when Teflon (PTFE) is better?

I went into a brief explanation regarding the dielectric constant of Teflon in my post regarding Kimber TCSS wire, but briefly, it's a synthetic fluoropolymer that was developed by DuPont and has a dielectric constant of 2.1, lower (better) than all other noted cable dielectrics.

Silver-plated copper is a type of wire covered with Teflon that's widely available for industry applications. Belden offers it, among a number of other companies, and you'll find a number of military spec varieties of different vintages. The cost is relatively low compared to audiophile boutique wire and the quality is generally high. You do have to keep an eye out for tin covered wire though, it looks quite similar but sounds different, and not preferable in my experience. The reason these wires have silver or tin plating has to do with the extrusion process of Teflon, it's much easier to extrude it over silver or tin than copper from what I've read.

I've built a number of interconnects and speaker cables using silver-plated copper. While there is a vast variety of Teflon coated interconnect wire floating around out there (Neotech, Mundorf, Kimber, Legenburg, etc.) but when it comes to big, thick, burly speaker wire, that variety really dwindles away, I'd imagine due to production costs. So enter the silver-plated copper; you can snag some nice thick 10-12 gauge wire under a buck a foot, whether you're running one or two conductors per terminal, it's still works out to a lot cheaper than fancy boutique wires.

You can always dress it up and make it look nice too if you want ;) Here's a few I've put together:

2 x 10 Gauge - Black Nylon Covering, Rhodium Bananas

4 x 12 Gauge - Copper Bananas and Spades, Carbon Reflex at the "Y" Split

Above in Detail

2 x 10 gauge - Cotton Reinforced Hose covered with black Techflex

If you're looking for some nice quality bananas and spades, I've found that Homegrown Audio has a nice selection for reasonable prices. The sound from a silver-plated copper speaker cable is crisp and clear. Give it a shot before you lay down some serious dough on boutique wire.


February 17, 2011

Modifying the MHDT Constantine NOS DAC

Choosing a DAC (Digital Audio Converter) is a lot like choosing a car; there are a tons of options out there, but there are only a niche few that best suit your preferences and personality. After sampling quite a few DACs at various meets, I've found that I personally prefer NOS DACs. NOS means non over-sampling. I feel that they generally exhibit a fairly smooth and musical character and are non-fatiguing. Some people relate the sound to an analog record versus a digital CD. If you are after a quick, precise and analytical sounding DAC, then these aren't for you ;)

There are a number of NOS DACs on the market, including offerings from Scott Nixon, Ack! Industries, Teradak Audio, MHDT Labs, Lavry, DIY Paradise, Pacific Valve and others. I would argue that the Taiwanese company MHDT is one of the most well known makers of NOS DACs. They've offered a number of different levels of DACs, including the Digital Renaissance, Constantine, Paradisea and Havana, some with tubes, some without.

The MHDT Constantine is solid state, meaning it doesn't include tubes, and is an excellent value if you can find one on Audiogon. They typically sell used for $200-250 and would make an excellent introduction to non-oversampling DACs. With a few tweaks, I was able to eek out a little bit more detail while maintaining the same character of the DAC.


Original MHDT Constantine - Click to Enlarge
Modified MHDT Constantine - Click to Enlarge

There are a few slots on the board for film bypass caps that hadn't been taken advantage of, so Sonicaps were used, along with a couple other places where they would fit. Two of the original Elna Silmic caps were in the way of the capacitors, so they had to be removed and replaced with longer legged Silmics (with teflon tubing preventing any shorts). The BNC was replaced with a Vampire BNC and the output caps were swapped in favor of gold Obbligatos. Both the Sonicaps and Obbligatos are well known values in the world of film caps. You'll find a rundown here on the famous Humble Homemade HiFi Capacitor Test.

UPDATE (5/16/2011): While I was modding my MHDT Paradisea, I decided to go ahead and replace the four 0.10uF stock caps in the Constantine with Obbligatos. A little bit of drilling of the soldering eyelets was required for the thick leads. Luckily, the Constantine board is one sided and I didn't have to worry about the conductive shells of the Obbligatos touching any traces. I did opt to add teflon sleeving to the leads so that they wouldn't short across the shell though.

Newly added Obbligato caps
The Fine Print:
Please remember that modifications can be dangerous to you and/or your surroundings and should only be performed by a certified technician. The owner of this blog and all associated parties can not / will not be held responsible if you attempt a posted modification and cause physical harm to yourself or your surroundings. Many electronics contain high voltages that can kill, and mods, if performed improperly, can be a fire hazard. Please keep this in mind. 


February 14, 2011

My Personal Recipe for a Right Angle Power Cord

I've made a couple of power cords using a right angle IEC so far, the first using a DHLabs 10/3 power cable that was a little thick for my liking, and didn't incorporate a shield. Unfortunately, it seems, a nice off-the-shelf, shielded power cable for DIY purposes is hard to come by for a reasonable price. So for my Bottlehead kit, I decided that I would make one from scratch that had the features I valued; namely teflon dielectric and a woven shield. I'll be detailing the steps I went through below in order to make this reasonably priced PC. This process did take hours though :P

The materials I used for this project are as follows:
  • 10 gauge silver plated copper in teflon (cost varies)
  • Marinco 8215 ($8.75, PartsConnexion)
  • Woven Shield (Percy Audio)
  • Schurter IEC Female 15A 250V 90 degrees PN: 4784.0100 ($4.95, PartsConnexion)
  • Black 1/4" Techflex (CableOrganizer / Wirecare)
  • Chrome XC 1/4" Techflex (CableOrganizer / Wirecare)
  • Black 1/2" Heatshrink (CableOrganizer / Wirecare)
  • Loctite Adhesive ($3, Home Depot)
  • 5 Rolls of Plumbers Teflon Tape ($5, Home Depot)


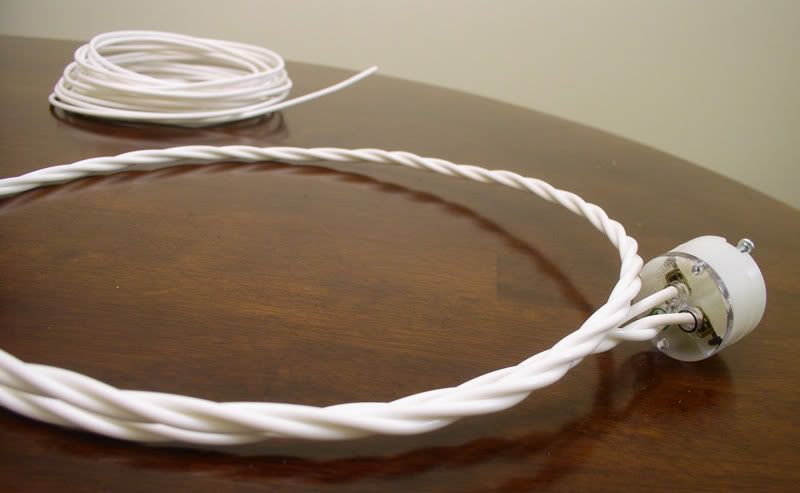
This cord was going to be four feet, so I trimmed three 10 gauge SPC in Teflon conductors and twisted them together by hand. I've seen people use a power drill to handle this process, but I wanted to be precise about it. A flat braid would have been more difficult to sleeve and insert into the Schurter IEC. The wire was then stripped to the appropriate length using the guide on the back of the Marinco plug, inserted and tightened with the screws around the circumference of the plug.


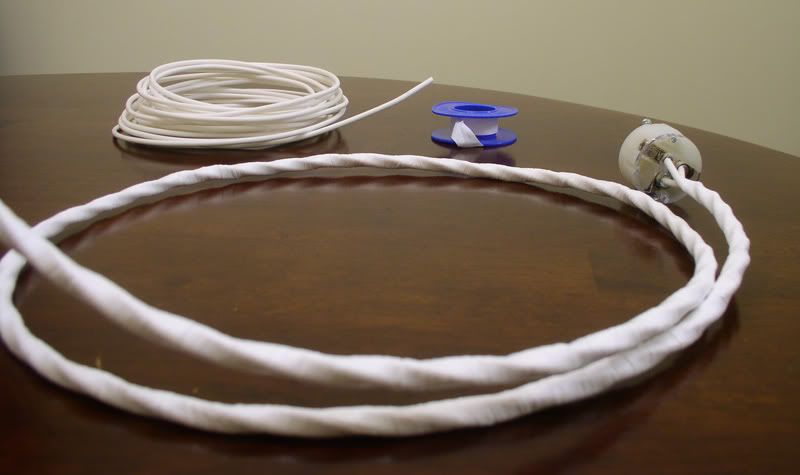
Now came the fun part, wrapping the cable with Teflon tape. This helps further isolate the shield from the conductors and helps maintain the cable geometry. Some would also say it adds damping. This is a long and boring process, so I like to have some music going in the background.


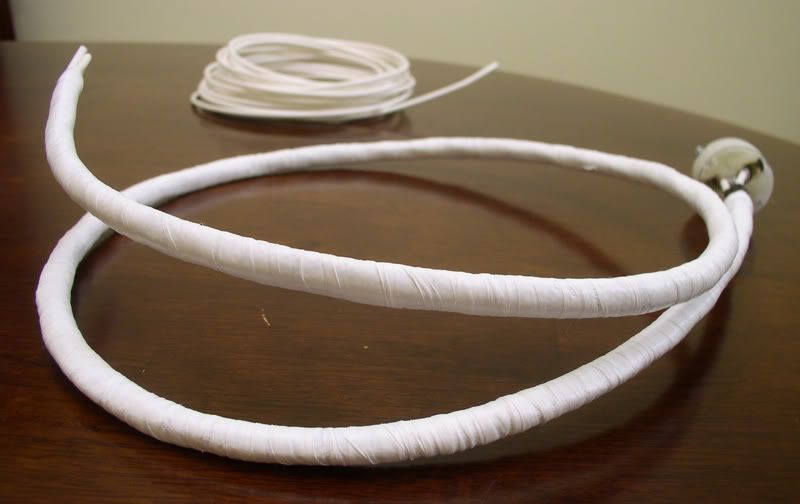
A woven tinned-copper shield was then sleeved over the cable. I used a smallish 22 gauge silver conductor I had handy to tie the shield to the source safety ground and soldered it in place. Electrical tape was then used to keep it stationary.


The cable was then wrapped with additional Teflon tape to flatten out the woven shield and isolate it.


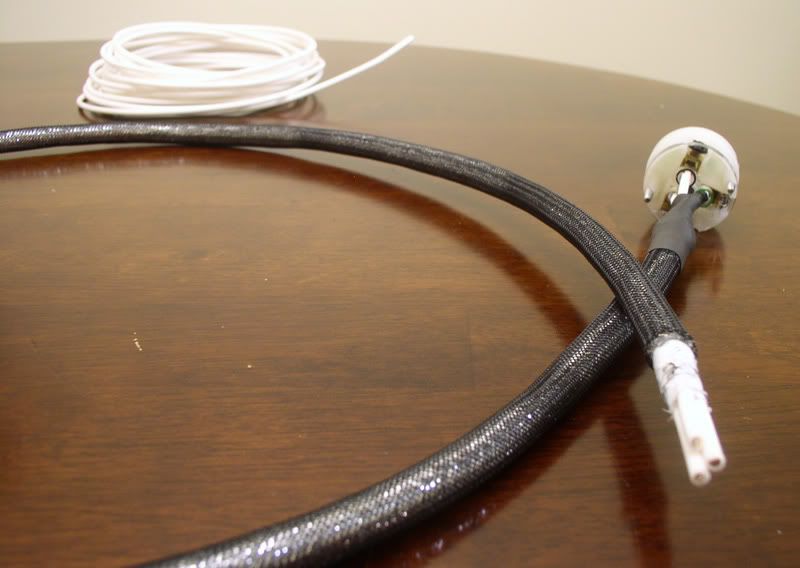
I chose a combination of Techflex brand Chrome XC and black PET sleeving, mostly for decorative purposes. Techflex states on their page that the Chrome XC sleeving offers shielding, so a little bit extra certainly can't hurt.


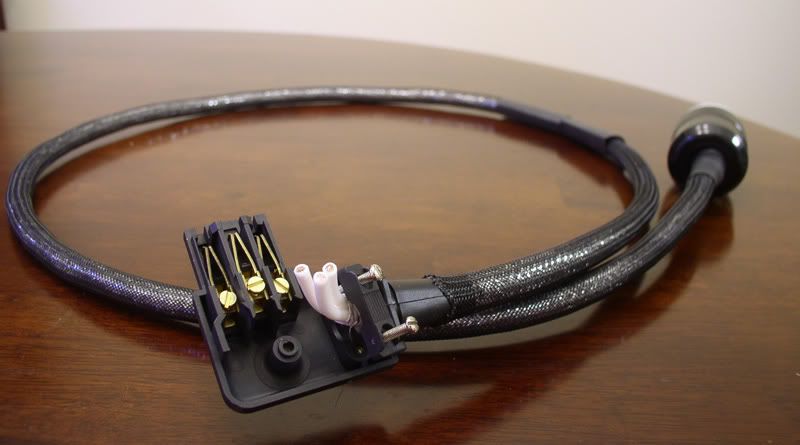
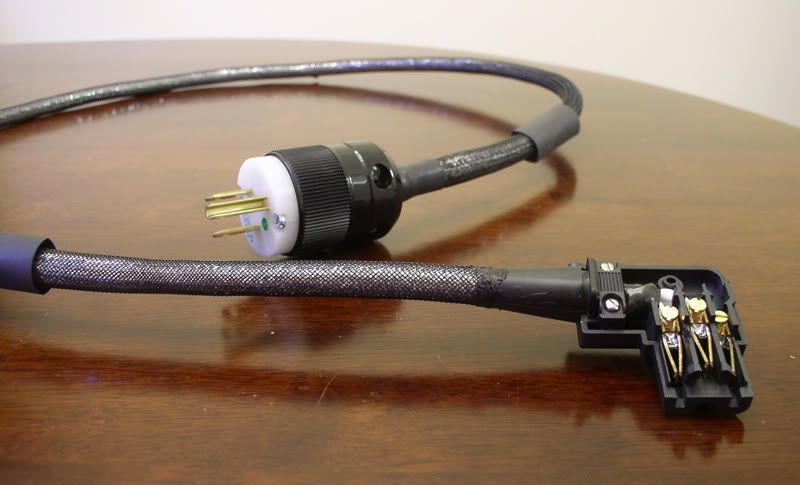
The Schurter IEC is then fitted. I've found this plug to be somewhat cumbersome to use, mostly because of the screw-hole that gets in the way of larger, stiffer conductors. Unfortunately, there are no other options that I know of for a decent right angle IEC. Also most boutique pre-made PC cable has a thick jacket that won't fit, so I've had to trim it at the boot and build up the area around the boot for a smooth appearance. The wires need to correspond to the way they are oriented on the plug, so a signal tester on my DMM was used as the wires aren't color coded.


I then stripped the wire, routed it into the sockets and screwed it in. Some solder was added using a hot setting (900 degrees) to ensure the wire would stay put if the screws loosened over time. The extra techflex was trimmed with a hot knife and melted to the boot. Some loctite was then placed in the area and two layers of 1/2" heatshrink were used as strain relief.


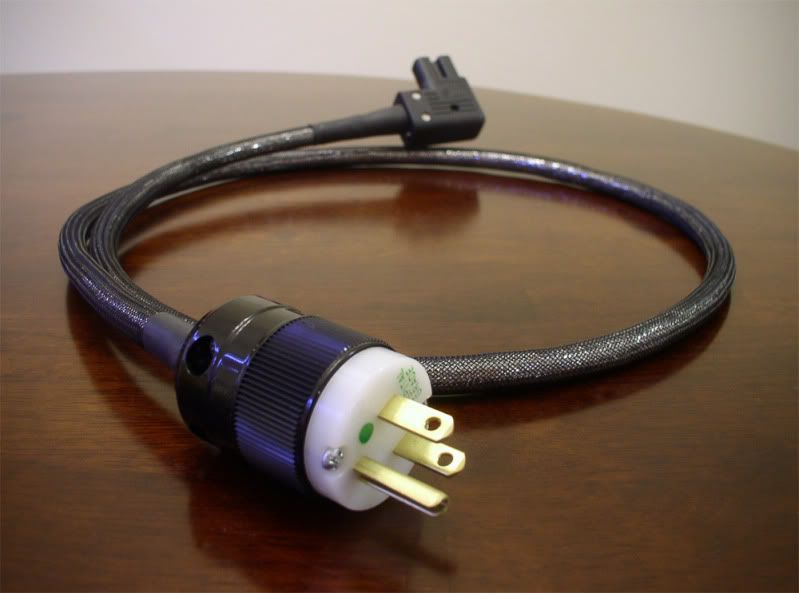
The final product. Came out rather nicely imho.

The Fine Print:
The above steps detailing the creation of a power cord are for entertainment purposes only, and not to be performed under any circumstances. Please remember that attempting to use homemade power cords can be dangerous to you and/or your surroundings. The owner of this blog and all associated parties can not / will not be held responsible if you attempt the process posted below and cause physical harm to yourself or your surroundings. Many electronics contain high voltages that can kill, and DIY power cables can be a fire hazard. Please keep this in mind.

Introductory Post - Zynsonix Blog

Welcome to the Zynsonix - DIY Audio Electronics Blog. Although this is my first post and my first blog, I frequent and post to many forums online (mostly audio related). You'll find me as HiGHFLYiN9 on Head-Fi, Bottlehead, DIYTube, DIYAudio and AudioCircle, just to name a few. You may be wondering what Zynsonix.com is; it's my own site featuring high-end audio cables and headphone recabling service (/shameless self promotion).

I've started this blog in the interest of having a conduit to post new builds, completed cables, audio experiments, recabled headphones, and perhaps even some artwork. I encourage you to visit the links on the right hand side of the page, they are all various amps, preamps, cables and other audio gear I've created, rebuilt or modified and added to this blog. The steps detailing the creation of any and all equipment are for entertainment purposes only, and not to be performed under any circumstances. Please remember that attempting to make anything displayed in future blogs can be dangerous to you and/or your surroundings. The blog owner and any associated parties can not / will not be held responsible if you attempt the process posted and cause physical harm to yourself or your surroundings. Many electronics contain high voltages that can kill, and DIY power cables can be a fire hazard. Please keep this in mind. 

With that out of the way, I encourage you to keep an eye on this blog for future posts and some eye candy ;) I've listed some examples of some of my DIY gear below, click on the links below the photo to check them out:


Bottlehead S.E.X. Headphone Amplifier

Bottlehead Crack Headphone Amplifier

Completely Rebuilt Dynaco PAS Pre-amplifier

Brand New Dynaco ST-70 Kit