Zynsonix Link

Showing posts with label point to point. Show all posts

January 18, 2022

The MOD Rock Bottom Guitar Effects Pedal

Today's post is a guest post from my bud Ryan Price and covers the MOD Rock Bottom Pedal. Ryan's been getting his feet wet in the DIY audio scene and doesn't shy away from some classic point-to-point wiring.


Please excuse the possible lack of common decorum for a post.  This is my first one and it’s a learning process.  I picked up a DIY guitar pedal build kit by MOD from Amplified parts.  I chose the Rock Bottom pedal for a few reasons.  First is I wanted an analog Fuzz.  Second is the extended low end so I can use it with both bass and guitar.  the “3” rating seemed like a challenge for a pedal build novice with some soldering experience.  Considering that I have plenty of time to kill as I’m currently recovering from a recent heart transplant, I went for it even if it was gonna be just outside my skill set so far.  I was able to finish it over the course of about 4-6 hours over a few nights. 
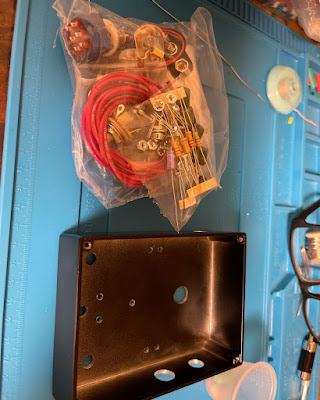
The Pedal Kit


Now for the breakdown.  The MOD kit comes with everything you need minus tools and solder.  I used a Hakko 888D soldering iron but for this application most would suffice I believe.  Hand tools I used were a MusicNomad guitar multitool, strippers, dikes, hemostats, and some modified pliers.  I put a bit of shrink tube around the jaws so as not to damage wire and components.  While the kit comes with everything you need the wire is not easy to work with if you don’t have a solder pot.  I own one but did not have access to it at the time of the build.  I substituted the wire with some I had left over from a previous project.  Its if a smaller gauge but of much higher quality.  That’s the only substitution I made. 
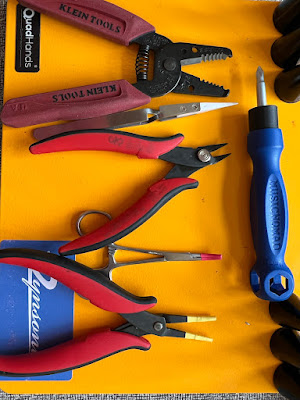

Tools of the Trade


The build is rather straightforward.  Starting with terminal strips, switches, and connectors.  The layout is very straight forward and with some planning can be a super clean build.  


Classic Turret Strips


Next they have you measure out the wire.  As I followed the directions closely up to this point I found the lengths a bit on the long side (editors note: you can make the wires shorter depending on your OCD level). But I can see why as its easy to trim to size.  Not so easy to add length!  Now I got ahead of myself and terminated both ends of the runs as I was building.  For my next build I plan to take things a bit slower.  Before terminating any connection I will dry fit all components, bend and run, then get a plan of how to go forward.  The directions are decent there are a few times you run into overlapping components. 


Wired Up


Component layout is definitely the most difficult part of the build and you should take your time.  Plan ahead and follow the directions.  That will make this build a breeze.  Don’t get ahead of yourself and begin terminating at a whim like I did as you will regret it.  It will also take more time than doing a layout before assembly.  Trust me on that one!  
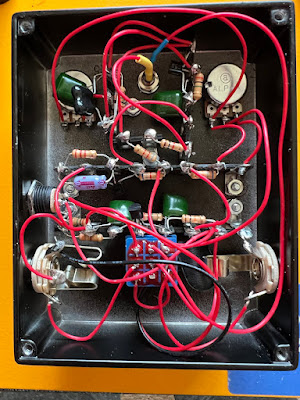


All Parts Installed

Once I fixed all my errors (there were many) it came together nicely. Powered right up and gave me sweet, sweet two transistor Fuzz! This pedal is a massive bang for your buck win. I can recommend it 100% to all but the most novice of DIY people. I can’t wait to build another MOD pedal in the near future. Amplified Parts has a great selection of all related components and tools (Editors note: if you're a knob snob they have a nice selection). As well as super solid shipping. I can’t recommend them enough.
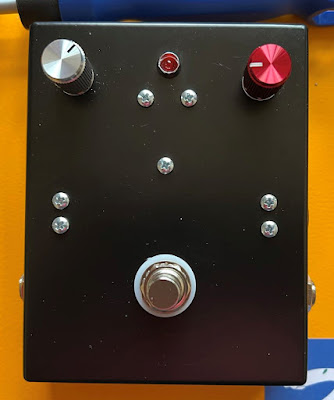


Finished Up

So if you’re got some soldering skills, desire to DIY, and a few hours I say go for it!  


I left the sticker off.  My wife is an artist and I’m going to have her paint and label the pedal!


(Editors note: we'll update the story when Ryan and his wife are all done.)


November 10, 2017

Matsumin Valvecaster Guitar Effects Pedal - Tube Overdrive

I've seen a few designs out there that starve a tube filament to maintain a low voltage and still provide nice results. The Matsumin Valvecaster is one of them. For those afraid to work with tubes due to high voltage (cue Electric Six, "Danger! High Voltage!"), this keeps the power at safer levels. It also allows a 9v battery to be used (or 12V) but will consume them fairly quickly... so an AC adapter is recommended.   

The design is nice and simple, and for beginning builders it's not too hard to follow the circuit visually. There are a couple of variations floating around, so if you're looking at multiple schematics or diagrams, be aware that they aren't all the same. Other builders have created their own unique pedals based on this design, but the values of the parts are different, so again, be aware ;) 

Matsumin Valvecaster schematic from hgamps

My favorite diagram/illustration was from David Smith. The input and output jacks are included as well as the 3PDT switch to bypass the circuit. David's illustration is intended for a turret board, but if you prefer point to point it's still easy to follow. Be sure to note the orientation of the 3PDT switch, it won't work if it's oriented differently (i.e. twisted 90 degrees). 


David Smith's diagram offers an easy-to-follow layout

Here's another diagram from Stompboxed, it's a little harder to follow but still helpful. 

Another diagram for reference. 

You'll probably want to use one of the larger Hammond 1590BB (or Hammond-style) chassis as I don't think trying to shoehorn this into a 1590B would be terribly easy. The 1590BB is available from the usual suspects, Mouser, Digikey, etc. in a variety of powdercoated colors. You can also go to Mammoth Electronics and get some much cooler paintjobs for a few more bucks, or go crazy with some waterslide decals... the sky is the limit. For this project I went with a purple Hammond 1590BB ... you can almost taste the grape looking at it.  


These are cast aluminum, so you need to treat them a little more gently than something that's extruded (e.g. try to do more drilling on the drill press rather than punching holes). Punching out the holes with a tool can sometimes take away more metal than you anticipated. 


I used larger Alpha pots in this build as I had them in the work-bin. CTS, Bourns and PEC also make good pots, and if you want to check out surplus, Clarostat and Allen Bradley are also great choices. The ceramic 9 pin tube socket is set against the chassis with a rubber "o" ring which can help quash microphonics. It's overkill for this build, but I had it in the bin. Beltons are cheaper and work great as well. 


There is a corresponding PCB to be used with CNC tube socket as the solder tabs are quite small to solder accurately. These can be found on Ebay by searching for "9 pin PCB", and Partsconnexion also carries them. 

The Russian PIO caps are a little on the large side and have metal shells, so they need to be carefully placed so they don't short any leads. They can also be covered with heatshrink. PTFE (teflon) tubing is placed on bare leads to ensure they don't short either. Also space needs to be given to the open-frame Switchcraft 11 1/4" jacks so they don't bump into any parts or wires when being inserted.  

Using different colored wire during the wiring process can help you visually follow the circuit if it doesn't work upon plugging in for the first time. Having a rat's nest of the same colored wire makes things much more difficult.   

Valvecaster wired up point to point

On top of the chassis a tube shield will be installed to protect the tube from an errant foot. You can find these in a number of anodized colors from Angela.com. I thought the gold looked nice contrasting against the purple. 

Top of the Valvecaster with Tube Shield off...

...and tube shield on

Hope you enjoyed the build process of the Matsumin Valvecaster Effects Pedal. You can see it's pretty easy to build a great effects pedal without a PCB and just a few parts. Remember to use good quality parts like Switchcraft 1/4" jacks, Alpha or CTS potentiometers, etc. to ensure your new pedal lasts a good long while. 


Please remember that building/modifying circuits can be dangerous to you and/or your surroundings and should only be performed by a certified technician. The owner of this blog and all associated parties can not / will not be held responsible if you attempt a build or modification posted above and cause physical harm to yourself or your surroundings. Many electronics contain high voltages that can kill, and mods, if performed improperly, can be a fire hazard.